
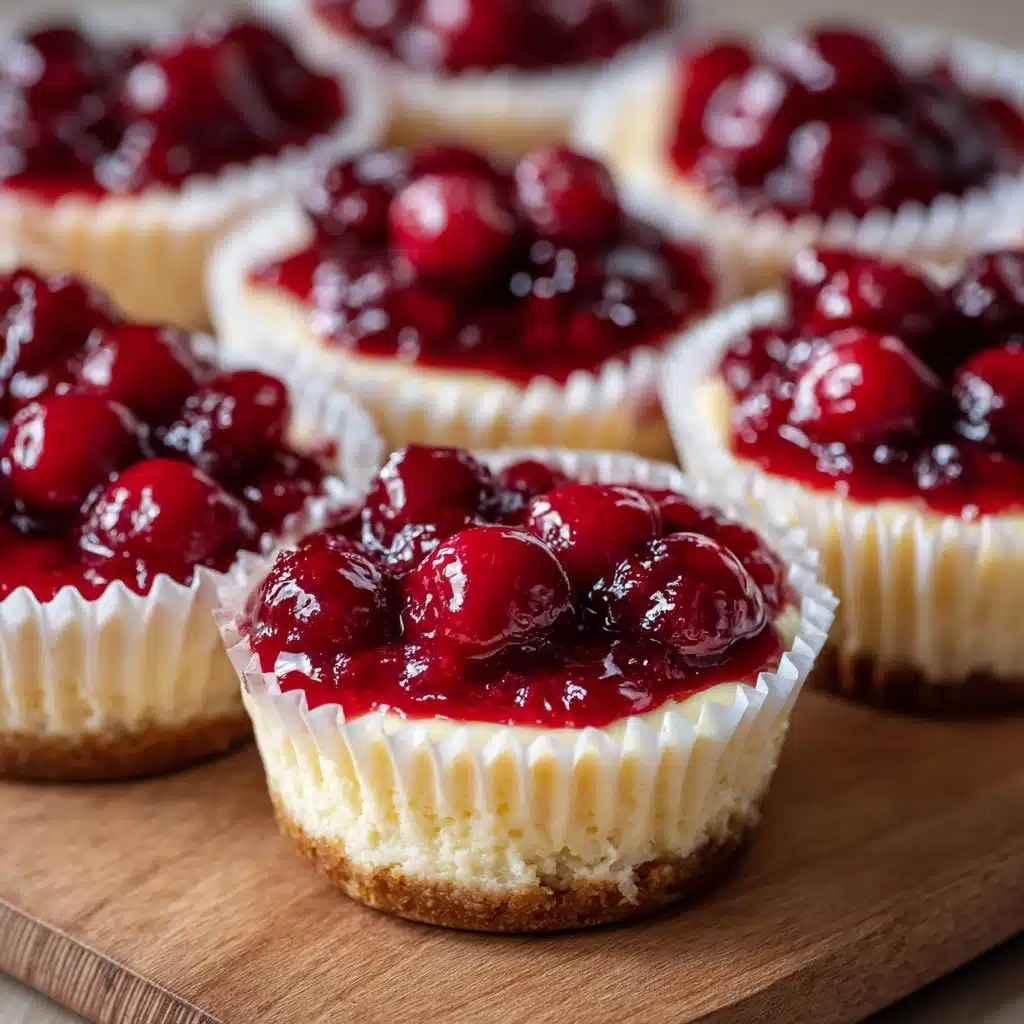
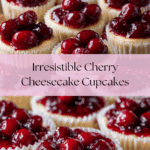
Cherry Cheesecake Cupcakes Recipe
Creamy, dreamy, and topped with glistening cherries, Cherry Cheesecake Cupcakes are that perfect blend of sweet, tart, and completely irresistible. These charming little treats bring all the elegance and flavor of classic cheesecake, but in a playful hand-held form that’s perfect for sharing (or keeping to yourself). Whether you’re new to baking or a seasoned dessert-maker, these cupcakes offer a deliciously foolproof way to wow your friends and family at gatherings, picnics, or, honestly, any day that needs a bright pop of joy.

Ingredients You’ll Need
This recipe calls for a handful of simple, everyday ingredients, but each one plays a vital part in making your Cherry Cheesecake Cupcakes truly special. From the crisp vanilla wafer crust to the luscious cherry topping, here’s what you’ll need—and why!
- 20 cupcake liners: These keep your cupcakes from sticking to the pan and make serving (and cleanup) a breeze.
- 20 vanilla wafers: The ultimate shortcut for a crunchy, flavorful base—no need to fuss with crumbs or butter.
- 16 ounces cream cheese (softened): The star of the show for that rich, creamy cheesecake texture.
- 2 eggs: Bind everything together and add a silky finish to the filling.
- 3/4 cup sugar: Sweetens the cheesecake—perfectly balanced against the tart cherries.
- 1 tablespoon lemon juice: Brightens up the flavor and cuts through the richness.
- 1 teaspoon vanilla: Adds warming, comforting depth to the filling.
- 21 ounce can cherry pie filling: Gives that glossy, sweet-tart finish—the signature of Cherry Cheesecake Cupcakes!
How to Make Cherry Cheesecake Cupcakes
Step 1: Prep the Pan and Crust
Start by preheating your oven to 375°F. Line your cupcake pan with 20 cupcake liners—using liners helps you remove the cupcakes cleanly and makes them easy to serve. Next, drop a vanilla wafer, flat side down, into the bottom of each liner. This simple step becomes the no-fuss crust that gives each bite a delightful crunch.
Step 2: Beat the Cream Cheese
In a small bowl, beat the softened cream cheese. Make sure your cream cheese is truly at room temperature; this ensures a supremely smooth, lump-free filling. Give it a good whip until it’s creamy and light, setting the stage for that classic cheesecake texture.
Step 3: Mix in Sugar, Eggs, Lemon Juice, and Vanilla
Now, add the sugar, eggs, lemon juice, and vanilla to your bowl. Continue mixing until everything is fully incorporated and the batter looks light and fluffy. The eggs help everything bind together, the sugar sweetens, the lemon juice adds brightness, and the vanilla gives the mixture its subtle complexity.
Step 4: Fill and Bake
Spoon the cheesecake mixture into your prepared cupcake liners, filling each about three-quarters of the way full. This gives them space to rise without spilling over. Bake for 15 to 20 minutes, or until the centers are set and no longer jiggly. Let the cupcakes cool while you prepare for the best part—the toppings!
Step 5: Top and Serve
Once fully cooled, transfer your mini cheesecakes to a serving tray. Spoon a generous dollop of cherry pie filling over each for that signature bold-and-bright finish. Now, your Cherry Cheesecake Cupcakes are ready to steal the show, whether you’re serving them as the star of a dessert table or as a delightful surprise at an afternoon coffee break.
How to Serve Cherry Cheesecake Cupcakes
Garnishes
The finishing touch matters! While cherry pie filling is classic, a sprinkle of finely grated lemon zest or a few curls of white chocolate will complement the bright, fruity topping. For a gourmet look, try adding a fresh mint leaf to each cupcake—just a tiny accent that elevates the whole presentation.
Side Dishes
These cupcakes really sing alongside light, fresh accompaniments. Serve with a fresh fruit salad, or a zippy citrus sorbet for a lovely contrast. A cup of coffee or a glass of ice-cold milk also helps balance their creamy richness, making your Cherry Cheesecake Cupcakes even more memorable.
Creative Ways to Present
Set your cupcakes on a tiered cake stand for a party-ready centerpiece, or arrange them in a rainbow of colorful liners for birthday fun. For more intimate gatherings, serve each Cherry Cheesecake Cupcake on a dessert plate with a drizzle of extra cherry sauce and a dusting of powdered sugar. The possibilities are endless, and presentation turns these simple treats into a showstopper every single time.
Make Ahead and Storage
Storing Leftovers
Store any leftover Cherry Cheesecake Cupcakes in an airtight container in the refrigerator. They’ll stay delicious and fresh for up to five days, with that signature creamy texture holding up beautifully for snacking all week long.
Freezing
If you want to make these cupcakes ahead or save some for later, they freeze wonderfully. Place cooled, undecorated cupcakes in a single layer in an airtight container, separating layers with parchment paper. Thaw in the fridge, then add the cherry topping just before serving to keep everything looking and tasting its best.
Reheating
No reheating is necessary for Cherry Cheesecake Cupcakes—these are meant to be served chilled! If you prefer a warmer bite, let them sit out for 10-15 minutes at room temperature before serving; this can slightly soften the texture and enhance the overall flavor.
FAQs
Can I use homemade cherry topping instead of canned?
Absolutely! If you have a bit of extra time, simmer fresh or frozen cherries with sugar and a touch of cornstarch to thicken. Homemade topping adds a personal touch and fresher fruit flavor to your Cherry Cheesecake Cupcakes.
What if I don’t have vanilla wafers?
No problem! You can swap in graham cracker squares, digestive biscuits, or even chocolate wafer cookies for an extra twist—all create a delicious, sturdy base.
How do I know when the cheesecake layer is done baking?
The centers should be set but just slightly wobbly when you gently jiggle the pan. Don’t overbake, as the residual heat will continue to cook them after they come out of the oven, ensuring that perfectly creamy bite.
Can I make these gluten-free?
Yes, just use gluten-free vanilla wafers or another gluten-free cookie base. All the other ingredients in Cherry Cheesecake Cupcakes are naturally gluten-free, so you can cater to even more guests!
Can I double the recipe for a larger crowd?
You sure can! This recipe scales up easily. Just make sure you have enough cupcake pans and liners, and bake in batches as needed to guarantee everyone gets their fair share.
Final Thoughts
Making Cherry Cheesecake Cupcakes is a joyful way to bring smiles to any occasion—whether you’re looking for a sweet ending to a family dinner or a standout treat for your next party. Give this recipe a try and let these fun, flavorful cupcakes become a new favorite in your dessert lineup!
Print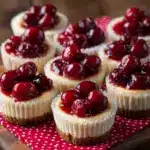
Cherry Cheesecake Cupcakes Recipe
- Total Time: 40 minutes
- Yield: 15–20 mini cheesecakes 1x
- Diet: Vegetarian
Description
Indulge in these delightful Cherry Cheesecake Cupcakes, a miniature twist on the classic dessert. Creamy cheesecake filling nestled on a vanilla wafer crust, topped with a luscious cherry pie topping. Perfect for individual servings!
Ingredients
Cupcake Base:
- 20 cupcake liners
- 20 vanilla wafers
Cheesecake Filling:
- 16 ounces cream cheese (softened)
- 2 eggs
- 3/4 cup sugar
- 1 tablespoon lemon juice
- 1 teaspoon vanilla
Topping:
- 21-ounce can cherry pie filling
Instructions
- Prepare Cupcake Base: Preheat oven to 375°F. Line cupcake pan with liners. Place a vanilla wafer, flat side down in the bottom of each liner.
- Make Cheesecake Filling: In a small bowl, beat softened cream cheese. Add sugar, eggs, lemon juice, and vanilla; mix until fluffy and light.
- Fill Cupcake Liners: Fill liners 3/4 full with cream cheese mixture. Bake for 15 to 20 minutes or until set. Let cool.
- Add Topping: Set mini cheesecakes out on a tray and spoon cherry pie filling on top of each. Makes 15 – 20 mini cheesecakes.
- Prep Time: 20 minutes
- Cook Time: 20 minutes
- Category: Dessert
- Method: Baking
- Cuisine: American
Nutrition
- Serving Size: 1 mini cheesecake
- Calories: 240
- Sugar: 16g
- Sodium: 190mg
- Fat: 15g
- Saturated Fat: 8g
- Unsaturated Fat: 6g
- Trans Fat: 0g
- Carbohydrates: 23g
- Fiber: 0.5g
- Protein: 4g
- Cholesterol: 70mg
Keywords: Cherry Cheesecake Cupcakes, Mini Cheesecakes, Dessert Recipe