
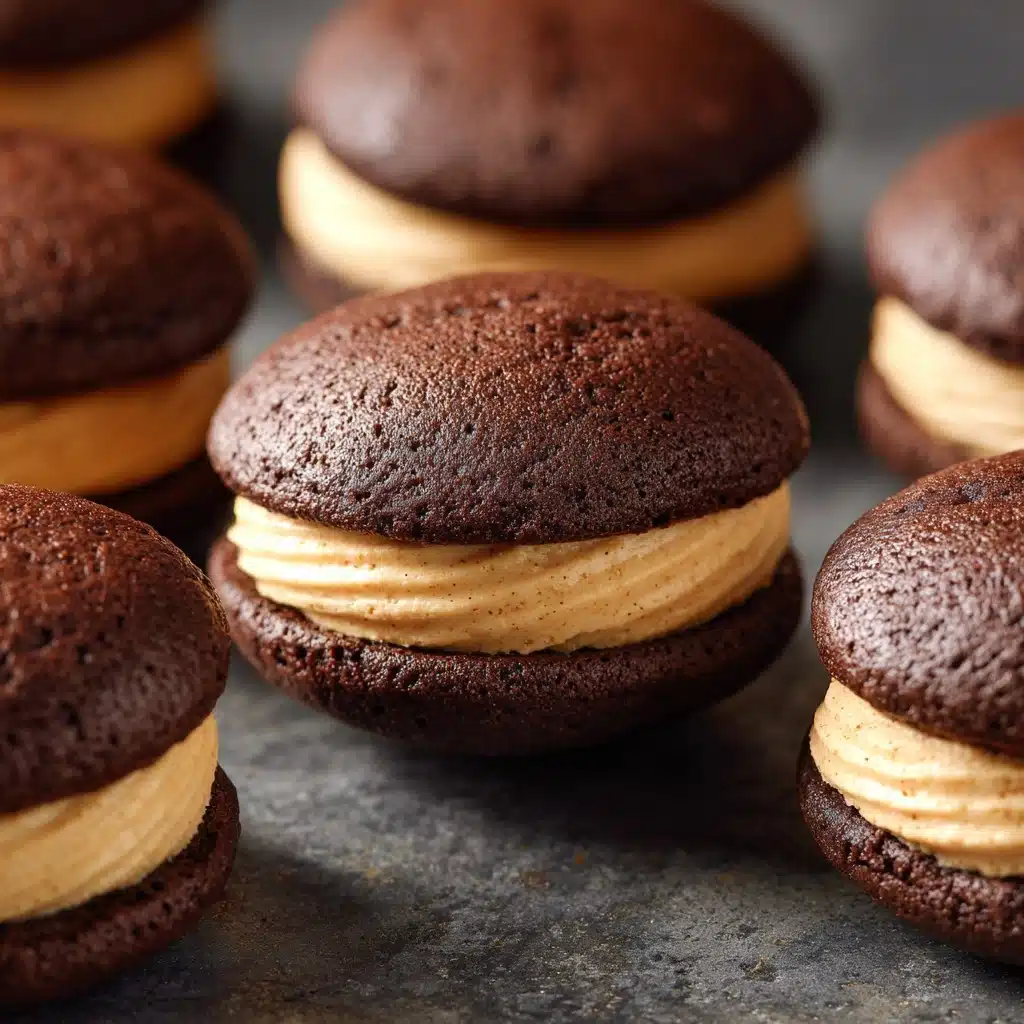
Chocolate Peanut Butter Whoopie Pies Recipe
If you love the delightful harmony of rich chocolate and creamy peanut butter, then you’re going to fall head over heels for these Chocolate Peanut Butter Whoopie Pies. These little sandwich cakes are like a hug in dessert form—with soft, cocoa-infused cake rounds perfectly paired with a luscious peanut butter frosting. Whether you’re looking for a show-stopping treat for a gathering or just want to indulge your sweet tooth with a nostalgic delight, these whoopie pies deliver comfort and excitement in every bite.
Ingredients You’ll Need
Gathering the right ingredients is both simple and essential to creating perfect Chocolate Peanut Butter Whoopie Pies. Each item plays a crucial role in bringing texture, flavor, and that irresistible richness to your finished pies.
- All-Purpose Flour: The foundation that gives the cakes structure and tenderness.
- Unsweetened Cocoa Powder: Adds deep chocolate flavor without overpowering the cake’s softness.
- Baking Soda & Baking Powder: These leavening agents ensure your cakes rise beautifully and stay light.
- Salt: Balances the sweetness and enhances the chocolate notes.
- Vegetable Shortening: Creates moist, tender cakes with a delicate crumb.
- Granulated Sugar: Sweetens and contributes to the cake’s fine texture.
- Vanilla Extract: Adds warmth and depth to both the cake and frosting.
- Large Egg: Binds ingredients and adds richness to the batter.
- Milk: Moistens the batter and helps create that soft, cake-like texture.
- Warm Water & Espresso Powder: The espresso subtly intensifies the chocolate flavor without tasting like coffee.
- Unsalted Butter: The creamy base of the peanut butter frosting, adding richness.
- Peanut Butter: Brings the signature nutty creaminess that pairs perfectly with the chocolate cake.
- Powdered Sugar: Sweetens and thickens the frosting for easy spreading or piping.
How to Make Chocolate Peanut Butter Whoopie Pies
Step 1: Prepare Your Oven and Baking Sheets
Start by adjusting your oven rack to the second level above the center, then preheat it to 375ºF. Line two baking sheets with parchment paper to prevent sticking and make cleanup a breeze. Setting this up first lets you focus on the batter without interruptions.
Step 2: Mix the Dry Ingredients
In a large bowl, whisk together the all-purpose flour, unsweetened cocoa powder, baking soda, baking powder, and salt. This dry mix ensures the chocolate flavor is evenly distributed and that your cakes will have the perfect rise and texture.
Step 3: Dissolve the Espresso Powder
Dissolve the espresso powder in warm water to boost the chocolate’s intensity subtly. This little trick pulls out richness in the cocoa without adding any coffee bitterness—trust me, it’s a game-changer!
Step 4: Cream Shortening and Sugar, Then Add Wet Ingredients
Using a mixer, beat vegetable shortening and granulated sugar on medium-high speed until the mixture turns light and fluffy. Then, incorporate the egg, vanilla extract, milk, and the dissolved espresso water. Mixing these well delivers a smooth, velvety batter base which ensures moist, tender cakes.
Step 5: Combine Dry and Wet Mixtures
Slowly add the dry ingredient mixture to the wet ingredients and mix on low speed until just combined. The batter should end up light and fluffy rather than dense or runny, which helps your whoopie pie cakes achieve that delicate softness we all crave.
Step 6: Portion and Bake the Cake Rounds
Using a cookie scoop (about 1 1/2 tablespoons), drop generous scoops of batter onto your prepared baking sheets, spacing them about 1 1/2 to 2 inches apart since they’ll spread a little. Bake at 375ºF for 12–14 minutes, or until the centers spring back when lightly pressed. This quick bake produces moist, tender cakes that hold together beautifully for sandwiching.
Step 7: Cool the Cakes
Let your whoopie pie cakes cool on the baking sheet for 5 minutes before transferring them to a cooling rack. This gentle cooling prevents them from breaking while still warm and ensures they won’t get soggy.
Step 8: Whip Up the Peanut Butter Frosting
Beat unsalted butter and creamy peanut butter together until smooth, then add vanilla extract. Gradually add sifted powdered sugar and mix until creamy and fluffy. Scrape down the bowl sides to incorporate all that peanut buttery goodness evenly for spreading or piping.
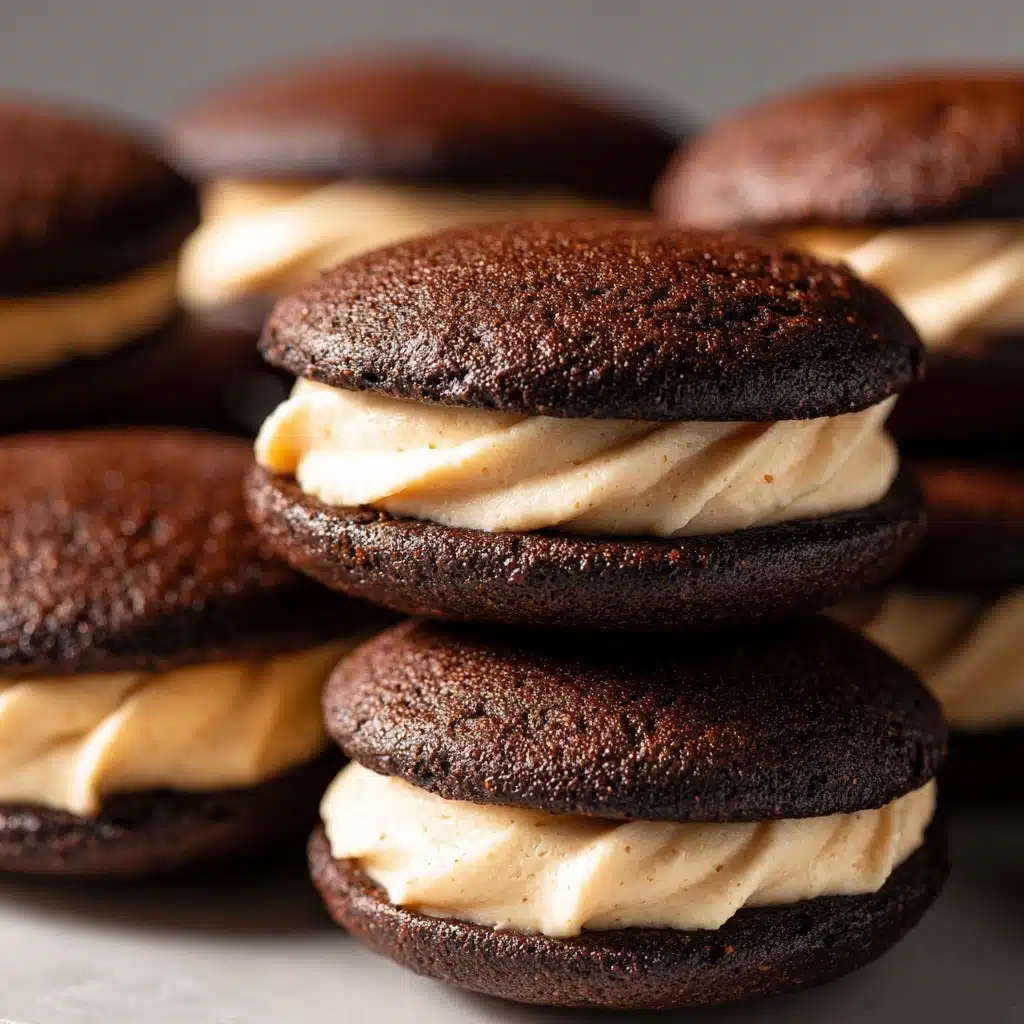
Step 9: Assemble the Chocolate Peanut Butter Whoopie Pies
Slather or pipe a generous dollop of peanut butter frosting on the bottom of one cake round, then gently press another on top. This sandwiching step is where magic happens, as the soft chocolate cake and creamy peanut butter meld perfectly together.
How to Serve Chocolate Peanut Butter Whoopie Pies
Garnishes
To add extra flair, dust the tops lightly with cocoa powder or powdered sugar for a simple yet elegant look. For more texture and flavor, sprinkle chopped roasted peanuts on the frosting before sandwiching for a delightful crunch.
Side Dishes
Pair your whoopie pies with a cold glass of milk or a cup of coffee to balance the richness. Fresh berries also refresh the palate and provide a juicy contrast to the creamy peanut butter and rich chocolate.
Creative Ways to Present
For parties, arrange the Chocolate Peanut Butter Whoopie Pies on a tiered dessert stand or wrap individually in colorful parchment paper tied with twine for charming edible favors. Piping the frosting with a star tip adds a professional touch that’s sure to impress guests.
Make Ahead and Storage
Storing Leftovers
You can keep the whoopie pies wrapped tightly in plastic wrap at room temperature for up to two days. For longer freshness, store them in an airtight container in the refrigerator for up to five days, making sure they’re wrapped well to prevent drying out.
Freezing
To freeze, wrap each pie tightly in plastic wrap, then place them in a sealed freezer bag. They’ll keep well for up to three months. When you’re ready for a treat, simply thaw them overnight in the fridge or at room temperature.
Reheating
Because these are soft cakes with creamy frosting, reheating isn’t necessary and may affect texture. If you prefer a slightly softer experience after refrigeration, let them sit at room temperature for 15–20 minutes before serving.
FAQs
Can I use natural peanut butter instead of creamy?
Natural peanut butter can work, but it’s often thinner and less sweet, so the frosting may be a bit runnier and less stable. For best results, stick with creamy peanut butter or adjust powdered sugar for thickness.
What if I don’t have espresso powder?
If you don’t have espresso powder on hand, you can simply omit it or replace it with instant coffee granules. The espresso powder is mainly there to enhance the chocolate flavor, so the pies will still be delicious without it.
Can I make these whoopie pies gluten-free?
Yes, you can substitute the all-purpose flour with a gluten-free blend designed for baking. Just make sure it contains xanthan gum or another binder to keep the cakes tender and soft.
How long do these whoopie pies last?
When stored properly in the refrigerator, Chocolate Peanut Butter Whoopie Pies can last up to five days. For best texture and flavor, enjoy them within this timeframe or freeze for longer storage.
Can I use butter instead of vegetable shortening in the cakes?
Yes, you can substitute butter for vegetable shortening, but expect a slightly denser texture and more pronounced buttery flavor. Shortening helps create a lighter, softer crumb, so results might differ a bit.
Final Thoughts
Chocolate Peanut Butter Whoopie Pies are an absolute winner when it comes to combining classic, comforting flavors with a fun and easy-to-enjoy form. I encourage you to dive into making these delightful treats at home—they’re perfect for sharing, gifting, or simply savoring as your go-to dessert. Once you taste that perfect balance of fluffy chocolate cake and creamy peanut butter frosting, these whoopie pies might just become your new favorite indulgence!
Print
Chocolate Peanut Butter Whoopie Pies Recipe
- Total Time: 34 minutes
- Yield: 12 whoopie pies 1x
- Diet: Vegetarian
Description
Delightfully rich Chocolate Peanut Butter Whoopie Pies featuring moist cocoa cakes sandwiched with a creamy, smooth peanut butter frosting. Perfect for a sweet treat or special occasion, these whoopie pies combine the perfect balance of chocolate and peanut butter flavors in a soft, fluffy bite-sized dessert.
Ingredients
Dry Ingredients
- 2 cups All-Purpose Flour
- 1/2 cup Unsweetened Cocoa Powder
- 1 tsp Baking Soda
- 1/4 tsp Baking Powder
- 1/8 tsp Salt
Wet Ingredients for Cakes
- 1/2 cup Vegetable Shortening
- 1 cup Granulated Sugar
- 1 tsp Vanilla Extract
- 1 Large Egg (room temperature)
- 1/2 cup Milk (any dairy milk can be used)
- 1/2 cup Warm Water
- 1/2 tsp Espresso Powder (dissolved in warm water)
Frosting Ingredients
- 1 cup Unsalted Butter (room temperature)
- 1 cup Peanut Butter (creamy)
- 2 1/2 cups Powdered Sugar (sifted)
- 2 tsp Vanilla Extract
Instructions
- Preheat and prepare baking sheets: Adjust oven rack to the 2nd level position (just above center) and preheat oven to 375ºF. Line two baking sheets with parchment paper and set aside.
- Mix dry ingredients: In a large bowl, whisk together all-purpose flour, unsweetened cocoa powder, baking soda, baking powder, and salt. Set aside.
- Dissolve espresso powder: Dissolve the espresso powder in warm water and set aside to cool slightly.
- Cream shortening and sugar: Using a hand mixer or stand mixer fitted with a paddle attachment, beat vegetable shortening and granulated sugar on medium-high speed until light and fluffy.
- Add wet ingredients to batter: Add the egg, vanilla extract, milk, and dissolved espresso powder to the creamed mixture. Mix until blended.
- Combine dry and wet mixtures: Add the dry ingredient mixture to the wet mixture and mix on low speed until just combined. The batter should be light and fluffy, not heavy or runny.
- Portion the batter: Using a 1 1/2 tablespoon or medium cookie scoop, drop generous scoops of batter onto the prepared baking sheets, spacing them about 1 1/2 to 2 inches apart. Each baking sheet should hold 6 cakes.
- Bake the cakes: Bake at 375ºF for 12 to 14 minutes or until the centers spring back when lightly pressed.
- Cool the cakes: Allow the cakes to cool slightly on the baking sheet for 5 minutes before transferring to a wire rack to cool completely.
- Prepare peanut butter frosting: Using a hand or stand mixer with a paddle attachment, beat unsalted butter and creamy peanut butter together until smooth. Add vanilla extract and mix.
- Add powdered sugar: Gradually add sifted powdered sugar to the peanut butter mixture, mixing until well blended. Scrape down the bowl sides as needed for even mixing.
- Assemble whoopie pies: Using a small spatula or piping bag, spread or pipe peanut butter frosting onto the bottom side of one cake, then top with another cake to form a sandwich.
- Storage: Wrap each whoopie pie tightly in plastic wrap. Store at room temperature for up to 2 days, in an airtight container in the fridge for up to 5 days, or freeze wrapped tightly in plastic and stored in a freezer bag for up to 3 months.
Notes
- Use room temperature eggs and butter for better mixing and texture.
- Espresso powder enhances the chocolate flavor but can be omitted if unavailable.
- For dairy-free versions, substitute milk with almond or oat milk and use dairy-free butter alternatives.
- Ensure powdered sugar is sifted to prevent clumps in the frosting.
- Do not overbake the cakes to keep them soft and moist.
- These whoopie pies are best enjoyed within a few days but freeze well for longer storage.
- Prep Time: 20 minutes
- Cook Time: 14 minutes
- Category: Dessert
- Method: Baking
- Cuisine: American
Nutrition
- Serving Size: 1 whoopie pie
- Calories: 340 kcal
- Sugar: 28 g
- Sodium: 150 mg
- Fat: 22 g
- Saturated Fat: 8 g
- Unsaturated Fat: 12 g
- Trans Fat: 0 g
- Carbohydrates: 32 g
- Fiber: 3 g
- Protein: 5 g
- Cholesterol: 45 mg
Keywords: Chocolate Peanut Butter Whoopie Pies, Chocolate cakes, Peanut butter frosting, Sandwich cookies, Soft cookies, Dessert recipe


