
Cotton Candy Cookies Recipe
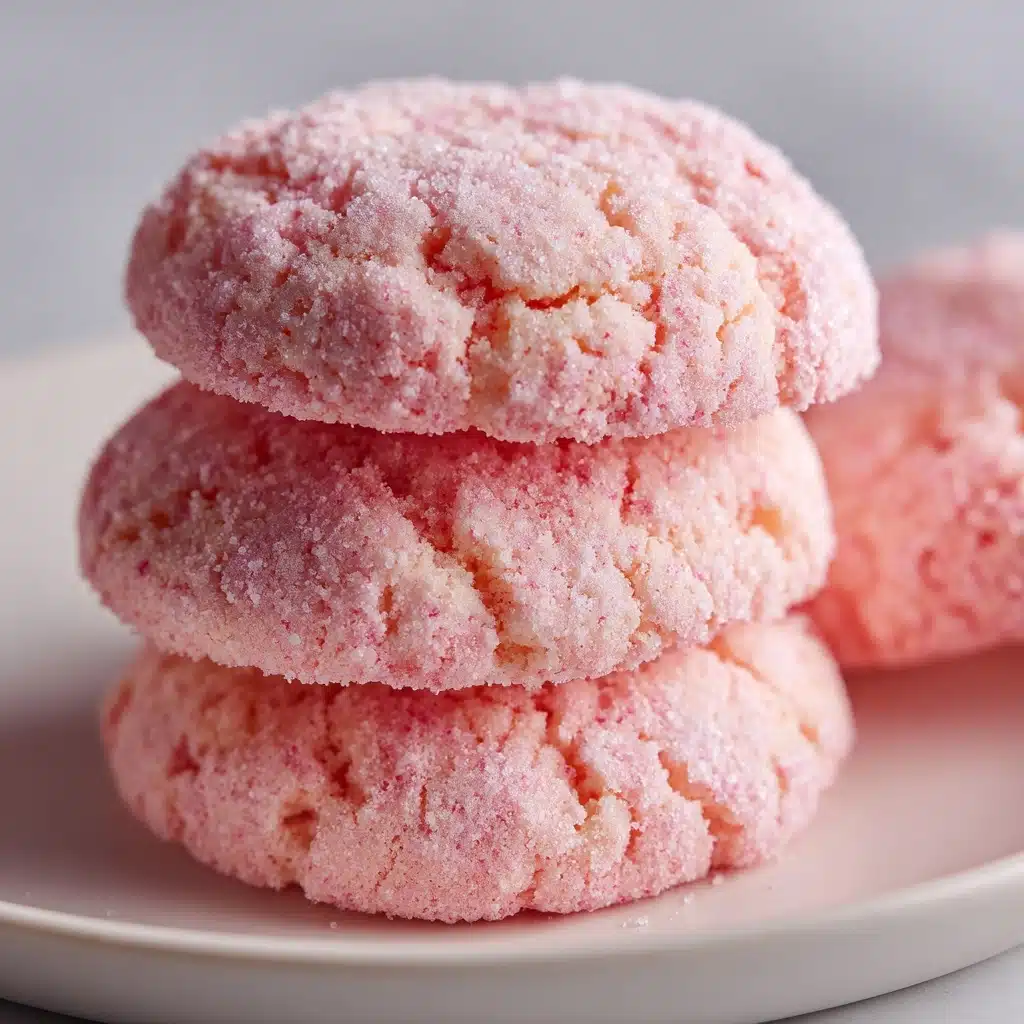
Bright, soft, and bursting with nostalgic whimsy, these Cotton Candy Cookies are a true showstopper for any celebration or simply when you want to bring a bit of fun to your kitchen. With that sweet, unmistakable cotton candy flavor tucked inside every chewy bite, these cookies blend carnival-day playfulness with the comforts of a homemade treat. Whether you’re baking for kids, friends, or the young-at-heart, this is a cookie recipe that’s designed to spread smiles and sprinkle a bit of magic into your day.
Ingredients You’ll Need
Every ingredient in this recipe pulls its weight, from the dreamy cotton candy extract to the tiny flecks of colorful sprinkles. These cookies are simple at heart, but a few creative touches make them unforgettable. Let’s take a look at what you’ll need for your batch of Cotton Candy Cookies.
- Unsalted butter, softened: Brings rich flavor and the perfect tender crumb to each cookie.
- Granulated sugar: Sweetens the dough and creates those lovely lightly crispy edges.
- Light brown sugar, packed: Adds a touch of caramel-like depth and helps keep the cookies soft and chewy.
- Large egg: Binds everything together for a cohesive, sturdy cookie.
- Vanilla extract: Rounds out the sweetness and amps up the nostalgic flavor.
- Cotton candy extract: The star of the show—just a small amount delivers unmistakable carnival nostalgia.
- All-purpose flour: Provides structure and absorbs just the right amount of moisture.
- Baking soda: Gives the cookies their soft, puffy lift.
- Baking powder: Works with the baking soda to ensure just the right amount of rise.
- Salt: Even in sweet cookies, a bit of salt makes the flavors pop.
- Cotton candy sprinkles (or colorful nonpareils): For a pop of vibrant color and party-ready crunch.
- Optional: Pink and blue gel food coloring: Helps create that classic cotton candy swirl and makes these cookies truly eye-catching.
How to Make Cotton Candy Cookies
Step 1: Preheat the Oven and Prepare Your Baking Sheet
Get ready for cookie magic! Start by preheating your oven to 350°F (175°C). Line a baking sheet with parchment paper or a silicone baking mat to keep your cookies from sticking and ensure an easy cleanup once they’re baked.
Step 2: Cream the Butters and Sugars
In a large mixing bowl, cream together the softened unsalted butter, granulated sugar, and light brown sugar. Beat the mixture until it’s light, fluffy, and creamy—this process adds air to the dough for a perfectly soft cookie texture.
Step 3: Add the Egg, Vanilla, and Cotton Candy Extract
Next, beat in the egg, vanilla extract, and cotton candy extract. Make sure everything is fully combined before moving to the next step—at this stage, your kitchen will start smelling absolutely amazing.
Step 4: Whisk the Dry Ingredients
In a separate bowl, whisk together the all-purpose flour, baking soda, baking powder, and salt. This ensures the leaveners and salt are evenly distributed, so you get tender cookies every time.
Step 5: Combine the Wet and Dry Ingredients
Gradually add the dry mixture to the wet ingredients, mixing until just combined. Be careful not to overmix; a few streaks of flour are perfectly fine at this stage and help keep your cookies nice and soft.
Step 6: Fold in the Magic (Sprinkles and Food Coloring!)
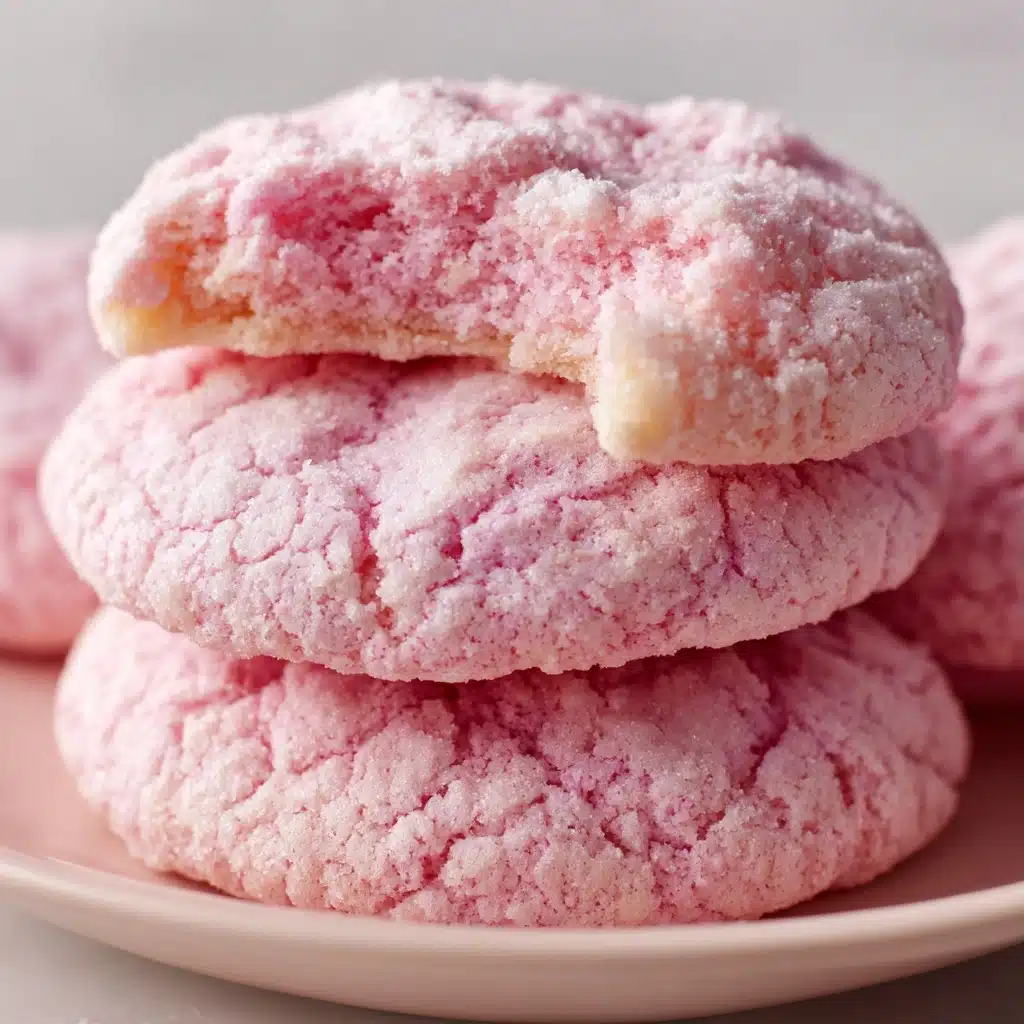
Gently fold in your cotton candy sprinkles for a glittering burst of color. If you’re going for the classic cotton candy look, divide your dough into two bowls and tint one half pink and the other blue with gel food coloring. Swirl the colors together, stopping before they fully mix for a beautiful, marbled effect.
Step 7: Shape and Arrange the Cookie Dough
Scoop tablespoon-sized balls of dough and gently roll them between your palms. Place each ball on the prepared baking sheet, spacing them about 2 inches apart to allow for a bit of spreading as they bake.
Step 8: Bake to Perfection
Bake your Cotton Candy Cookies for 8 to 10 minutes. Watch for edges that are just set and centers that look slightly underbaked. This gives you that irresistible chewy texture everybody loves.
Step 9: Cool and Finish
Let the cookies cool on the baking sheet for 5 minutes (they’ll continue to set up as they rest), then carefully move them to a wire rack to cool completely. This helps them stay soft and prevents overbaking.
Step 10: Time to Enjoy!
Once cooled, serve and enjoy your batch of homemade Cotton Candy Cookies. Bask in their magical colors and sweet, nostalgic aroma—they’re as delightful to look at as they are to eat!
How to Serve Cotton Candy Cookies
Garnishes
A dusting of powdered sugar or a handful of extra sprinkles on top can give your cookies even more carnival pizzazz. If you’re feeling whimsical, consider adding a tiny puff of real cotton candy on the side of each cookie just before serving for an extra-special touch.
Side Dishes
These cookies pair perfectly with a tall glass of cold milk, a creamy vanilla milkshake, or even a scoop of pastel-hued ice cream. For a party, arrange them on a platter with fresh fruit for a pop of color and a little balance to their sweetness.
Creative Ways to Present
Stack the cookies in clear treat bags tied with pastel ribbons, or serve them on a tiered dessert tray alongside other carnival-themed treats. You could also arrange them in a mason jar for a playful gift that’s almost too pretty to eat—almost!
Make Ahead and Storage
Storing Leftovers
Cotton Candy Cookies can be kept in an airtight container at room temperature for up to 4 days. They stay delightfully soft and chewy, so they’re just as good on day three as the day you baked them.
Freezing
You can absolutely freeze these cookies! Place cooled cookies in a freezer-safe bag or container, separating layers with parchment paper. They’ll keep their flavor and texture for up to two months—perfect for pulling out instant party magic any time.
Reheating
To bring your cookies back to life, just let them thaw at room temperature or pop them in the microwave for 5 to 10 seconds. This quick burst of heat revives that just-baked softness.
FAQs
Can I make Cotton Candy Cookies without food coloring?
Absolutely! While the pink and blue swirls make the cookies extra fun and true to their namesake, the flavor and texture still shine without any added color.
Where do I find cotton candy extract?
Cotton candy extract is often available at well-stocked grocery stores, cake supply shops, or online. It’s a fantastic ingredient to keep on hand for whimsical baking projects.
Can I use regular rainbow sprinkles instead of cotton candy sprinkles?
Yes! Any colorful sprinkle or nonpareil will bring that playful color and crunch. Just be sure to fold them in gently to avoid streaking the dough.
Can I make the dough ahead of time?
Definitely! You can prep the dough, wrap it well, and chill it in the fridge for up to 48 hours before baking. Chilling can even enhance the flavors and make the cookies a little chewier.
Are these cookies super sweet?
Cotton Candy Cookies are sweet, but the balance of brown and white sugars, plus a touch of salt, keeps them delicious without going overboard. The light, airy flavor is reminiscent of real cotton candy but in the best cookie form!
Final Thoughts
If you’re ready to add a little color and a whole lot of joy to your next baking day, give these Cotton Candy Cookies a try. They truly capture the magic of the fair in every bite! Whether you’re sharing them with family, friends, or just stealing a few for yourself, they promise a taste of childhood happiness and plenty of smiles.
Print
Cotton Candy Cookies Recipe
- Total Time: 30 minutes
- Yield: About 2 dozen cookies 1x
- Diet: Vegetarian
Description
These Cotton Candy Cookies are a whimsical and colorful treat that will delight both kids and adults. With a hint of cotton candy flavor and a fun marbled appearance, these cookies are perfect for themed parties or whenever you want a bit of nostalgia in a sweet treat.
Ingredients
Dough:
- 1/2 cup unsalted butter, softened
- 1/2 cup granulated sugar
- 1/2 cup light brown sugar, packed
- 1 large egg
- 1 tsp vanilla extract
- 1 tsp cotton candy extract
- 1 1/2 cups all-purpose flour
- 1/2 tsp baking soda
- 1/4 tsp baking powder
- 1/4 tsp salt
Additional:
- 1/4 cup cotton candy sprinkles (or colorful nonpareils)
- Optional: Pink and blue gel food coloring
Instructions
- Preheat the Oven: Preheat your oven to 350°F (175°C). Line a baking sheet with parchment paper or a silicone baking mat.
- Make the Cookie Dough: In a large mixing bowl, cream together the softened butter, granulated sugar, and brown sugar until light and fluffy.
- Beat in the egg, vanilla extract, and cotton candy extract until fully combined.
- Combine Dry Ingredients: In a separate bowl, whisk together the flour, baking soda, baking powder, and salt.
- Gradually add the dry ingredients to the wet ingredients, mixing until just combined.
- Add Sprinkles and Color (Optional): Fold in the cotton candy sprinkles.
- If using food coloring, divide the dough into two bowls. Tint one portion pink and the other blue. Gently swirl the two colors together without overmixing to create a marbled effect.
- Shape the Cookies: Scoop tablespoons of dough and roll into balls. Place them on the prepared baking sheet, spacing them about 2 inches apart.
- Bake: Bake for 8–10 minutes, or until the edges are set and the centers look slightly underbaked.
- Let the cookies cool on the baking sheet for 5 minutes, then transfer to a wire rack to cool completely.
- Serve and Enjoy: Once cooled, serve and enjoy your colorful, cotton candy-flavored cookies!
- Prep Time: 20 minutes
- Cook Time: 10 minutes
- Category: Dessert
- Method: Baking
- Cuisine: American
Nutrition
- Serving Size: 1 cookie
- Calories: 120
- Sugar: 10g
- Sodium: 80mg
- Fat: 6g
- Saturated Fat: 4g
- Unsaturated Fat: 2g
- Trans Fat: 0g
- Carbohydrates: 15g
- Fiber: 0.5g
- Protein: 1g
- Cholesterol: 20mg
Keywords: Cotton Candy Cookies, Cotton Candy Flavored Cookies, Colorful Cookies, Marbled Cookies


