
Graveyard Pudding Cookie Cups Recipe
Introduction
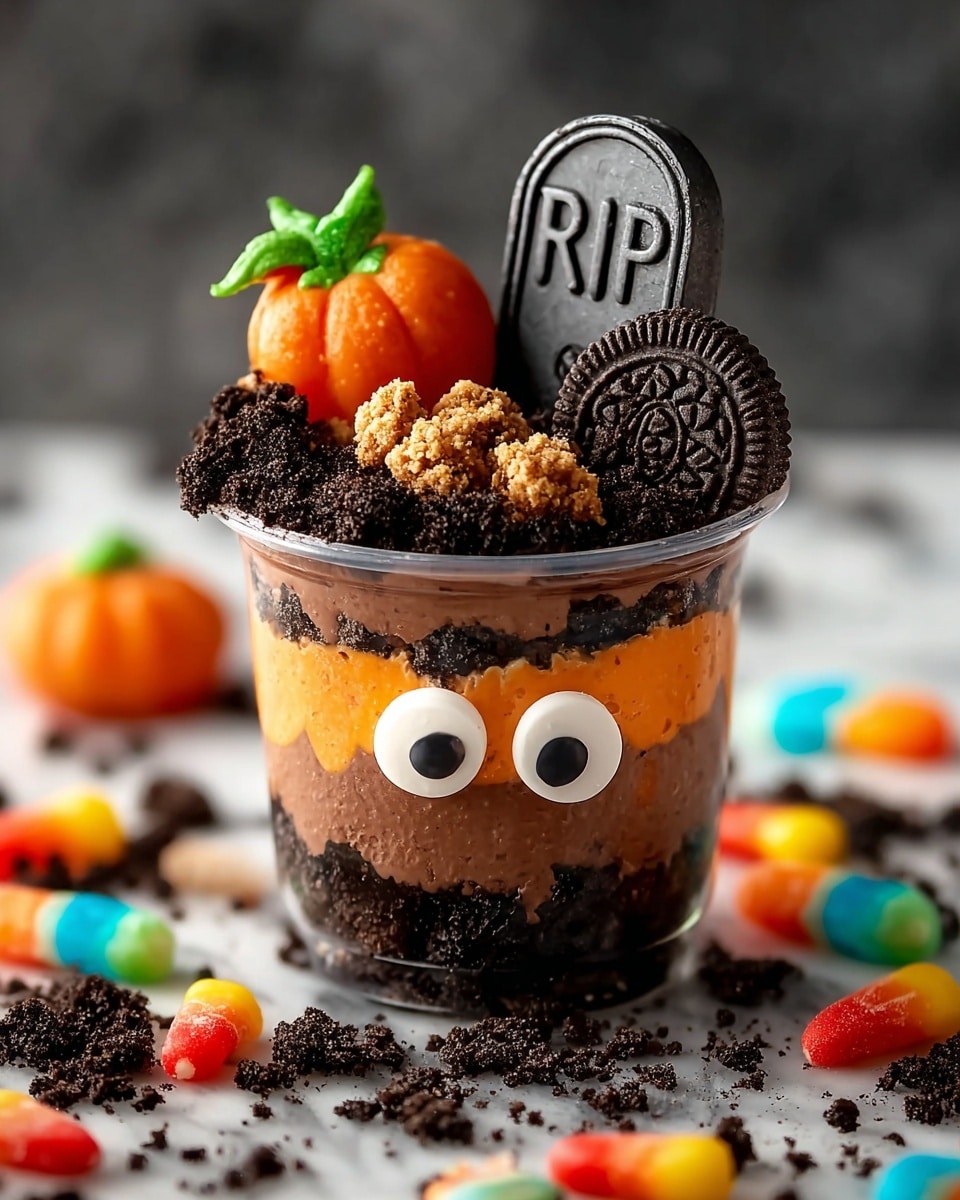
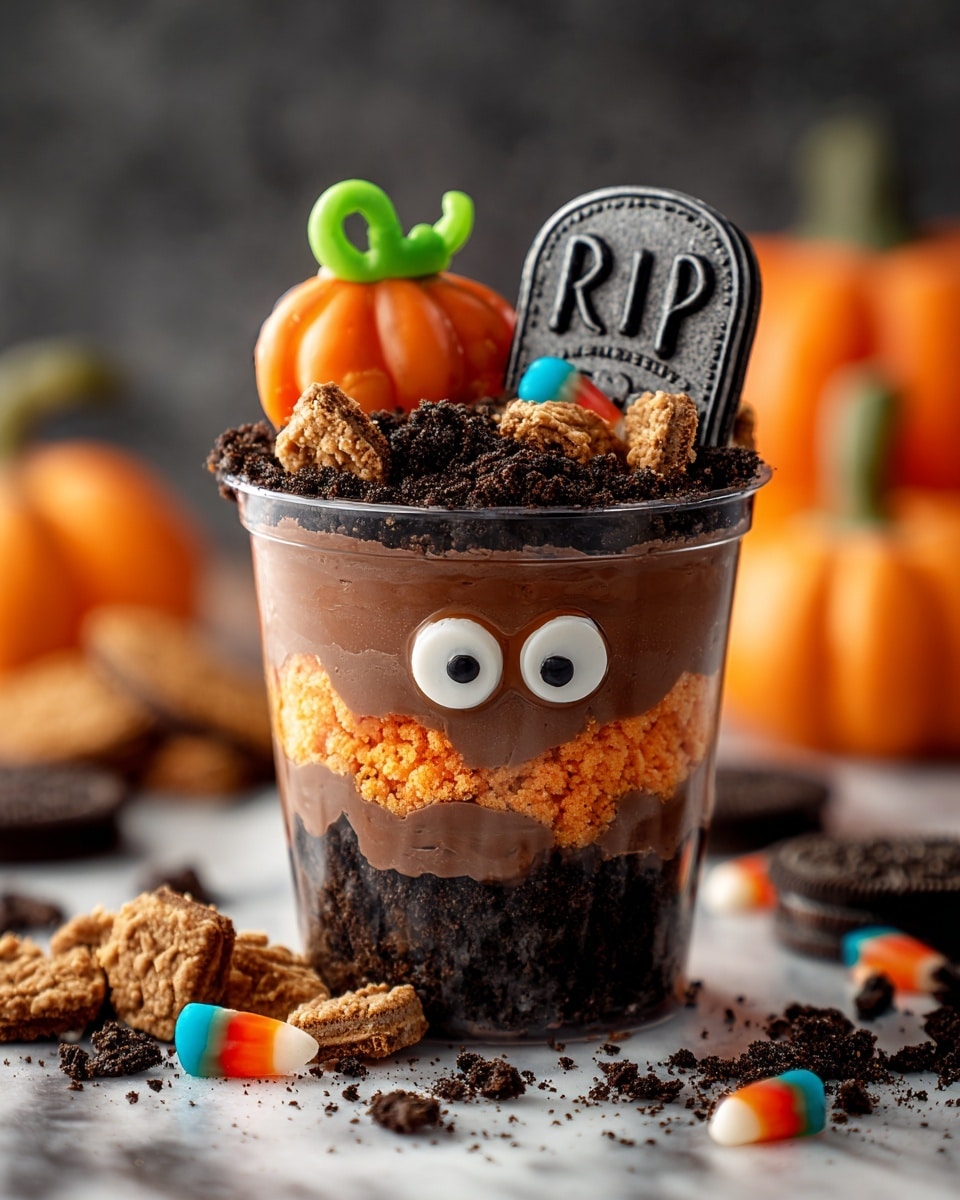
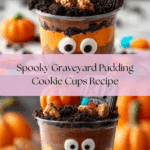
Graveyard Pudding Cookie Cups are a fun and spooky treat perfect for Halloween or any creepy celebration. These layered pudding cups combine chocolate flavor with crunchy Oreos and festive decorations, making them as delightful to eat as they are to look at.
Ingredients
- 5.1 oz chocolate instant pudding mix
- 3 cups milk
- 8 oz Cool Whip
- 24 Oreo cookies, crushed
- 6 Milano double chocolate cookies (for tombstones)
- Black frosting or edible marker (for “RIP”)
- 6 candy pumpkins
- Googly eyes (edible)
- Gummy worms (optional)
Instructions
- Step 1: Write “RIP” on each Milano cookie using black frosting or an edible marker to create tombstones.
- Step 2: In a bowl, whisk together the chocolate instant pudding mix and milk until thickened. Gently fold in the Cool Whip until combined.
- Step 3: Crush the Oreo cookies into fine crumbs to resemble dirt.
- Step 4: In each cup, start by layering a spoonful of Oreo crumbs, then press edible googly eyes against the sides of the cups. Add a layer of pudding on top, then repeat the layers once more.
- Step 5: Finish each cup with a generous Oreo “dirt” topping.
- Step 6: Insert one “RIP” tombstone cookie and a candy pumpkin into each cup. Add gummy worms on top if desired for extra creepiness.
Tips & Variations
- For extra flavor, try mixing a bit of instant coffee powder into the pudding to deepen the chocolate taste.
- You can substitute Cool Whip with whipped cream for a fresher texture.
- Use different colored candy pumpkins or spooky decorations to customize your graveyard theme.
- Try layering crushed graham crackers with cinnamon instead of Oreos for a different “dirt” flavor.
Storage
Store the pudding cups covered in the refrigerator for up to 2 days. Avoid freezing, as the texture of the pudding and whipped topping may change. Remove any cookie tombstones before reheating and consume chilled for the best experience.
How to Serve
Serve this delicious recipe with your favorite sides.
FAQs
Can I make these pudding cups ahead of time?
Yes, these cups can be assembled a few hours in advance and stored in the refrigerator. This allows the pudding to set and flavors to meld, but add the cookie tombstones just before serving to keep them crisp.
What if I don’t have Oreo cookies?
You can use any chocolate sandwich cookies or crush chocolate wafer cookies as a substitute. The key is to have a crunchy, chocolatey layer to mimic “dirt.”
Print
Graveyard Pudding Cookie Cups Recipe
- Total Time: 15 minutes
- Yield: 6 servings 1x
- Diet: Vegetarian
Description
These Graveyard Pudding Cookie Cups are a fun and spooky dessert perfect for Halloween parties. Layers of creamy chocolate pudding, crushed Oreo ‘dirt,’ and creepy candy decorations come together in individual cups for an easy-to-make treat. The Milano cookie tombstones decorated with ‘RIP’ add the perfect eerie touch, while candy pumpkins, gummy worms, and googly eyes bring playful Halloween vibes.
Ingredients
Pudding Base
- 5.1 oz chocolate instant pudding mix
- 3 cups milk
- 8 oz Cool Whip
Cookie Layers and Decorations
- 24 Oreo cookies (crushed)
- 6 Milano double chocolate cookies (for tombstones)
- Black frosting or edible marker (for “RIP” decoration)
- 6 candy pumpkins
- Googly eyes (edible)
- Gummy worms (optional)
Instructions
- Decorate Tombstones: Use black frosting or an edible marker to write “RIP” on each of the Milano double chocolate cookies, creating spooky tombstones for the dessert cups.
- Prepare Pudding Mixture: Whisk the chocolate instant pudding mix with 3 cups of milk until it thickens completely. Then gently fold in the Cool Whip to create a light, creamy pudding base.
- Crush Oreos: Crush the Oreo cookies into fine crumbs to resemble dirt, reserving these crumbs for layering and topping the cups.
- Assemble Cups – Layering: Start by adding a layer of Oreo crumbs to the bottom of each cup. Place a few edible googly eyes pressed against the sides for a fun spooky look. Then add a layer of the pudding mixture. Repeat these layers once more until the cup is almost full.
- Add Oreo Dirt Topping: Finish the assembly by sprinkling the remaining crushed Oreos on the top to simulate dirt on the graveyard surface.
- Decorate with Tombstones and Candy: Insert a decorated Milano cookie tombstone and a candy pumpkin into each cup. For extra creepy fun, add gummy worms on top or peeking out of the cookie dirt if desired.
Notes
- Use chilled milk for a quicker pudding set and better texture.
- Make sure to fold in the Cool Whip gently to keep the pudding light and airy.
- Edible googly eyes can be found in baking supply stores or online; alternatively, small candy eyes work well.
- These cups can be prepared ahead and refrigerated for up to 1 day before serving.
- For nut-free version, double check all ingredient labels to avoid cross-contamination.
- Prep Time: 15 minutes
- Cook Time: 0 minutes
- Category: Dessert
- Method: No-Cook
- Cuisine: American
Keywords: Halloween dessert, pudding cups, Oreo cookie cups, spooky treats, Halloween party dessert, no-bake dessert
