
Handmade Sub Rolls Recipe
If you’ve ever dreamed of biting into a sandwich that starts with soft, fluffy bread with just the right amount of chew and a golden crust, then these Handmade Sub Rolls are exactly what you need in your kitchen. These rolls are a labor of love, combining simple, wholesome ingredients that come together to create the perfect foundation for any sub sandwich. Whether you’re stacking them high with your favorite fillings or just enjoying the fresh-baked aroma wafting through your home, these rolls have a way of stealing the show every time.
Ingredients You’ll Need
This recipe calls for straightforward, quality ingredients that work harmoniously to deliver that classic sub roll texture and flavor you crave. Each component plays a crucial role, from the tender crumb the eggs provide to the rich flavor that the butter imparts.
- Whole Milk (90℉): Warm milk activates the yeast and contributes to a tender crumb in the final bake.
- Granulated Sugar: Feeds the yeast for that perfect rise and adds a subtle sweetness.
- Active Dry Yeast: The magic behind the dough’s rise and fluffy texture.
- Bread Flour: Provides the necessary gluten structure for that classic chewiness.
- Fine Sea Salt: Balances flavor and strengthens the dough’s texture.
- Eggs (Beaten): Adds richness, color, and softness to the dough.
- Unsalted Butter (Cold, Cubed): Infuses fat for tenderness and flavor complexity.
- Egg White (Beaten – For Egg Wash): Gives the rolls a beautiful golden sheen and slight crispness.
- Water (For Egg Wash): Thins the egg white for an even, smooth glaze.
How to Make Handmade Sub Rolls
Step 1: Bloom the Yeast
Start by combining warm whole milk with sugar and active dry yeast in a medium bowl. Let this mixture bloom for about 5 to 10 minutes until it’s frothy and alive—this is the first sign your Handmade Sub Rolls are on their way!
Step 2: Mix the Dry Ingredients
While your yeast is blooming, whisk together the bread flour and fine sea salt in the bowl of your stand mixer. This base is what will give your rolls their characteristic structure and flavor.
Step 3: Combine Wet and Dry Ingredients
Pour the frothy yeast mixture and beaten eggs into the flour and salt. Using the mixer on low speed, knead for 3 to 5 minutes until you get a shaggy dough. Make sure to scrape down the bowl sides occasionally to ensure even mixing.
Step 4: Incorporate the Butter
Add chilled, cubed butter to the dough. Continue kneading for 8 to 10 more minutes until the butter is fully absorbed and the dough is silky and smooth. This step makes the dough wonderfully rich and soft, which is essential for that fresh-baked bakery feel.
Step 5: First Rise
Turn your dough onto a lightly floured surface and shape it into a tight ball. Place it in a greased bowl, cover, and let it rest for an hour or until it has doubled in size. This slow rise builds flavor and texture.
Step 6: Divide and Shape Rolls
After your dough has risen, punch it down and divide it evenly into six portions. Roll each piece into a ball and then flatten with a rolling pin to form a 9 by 5-inch rectangle. Roll each rectangle tightly into a loaf shape, pinching the seams to seal perfectly.
Step 7: Second Rise
Place the shaped rolls seam-side down on a parchment-lined baking sheet. Cover with a damp cloth or a second baking sheet and let them rise for another 30 minutes. This step ensures your Handmade Sub Rolls will be light and airy when baked.
Step 8: Prepare and Bake
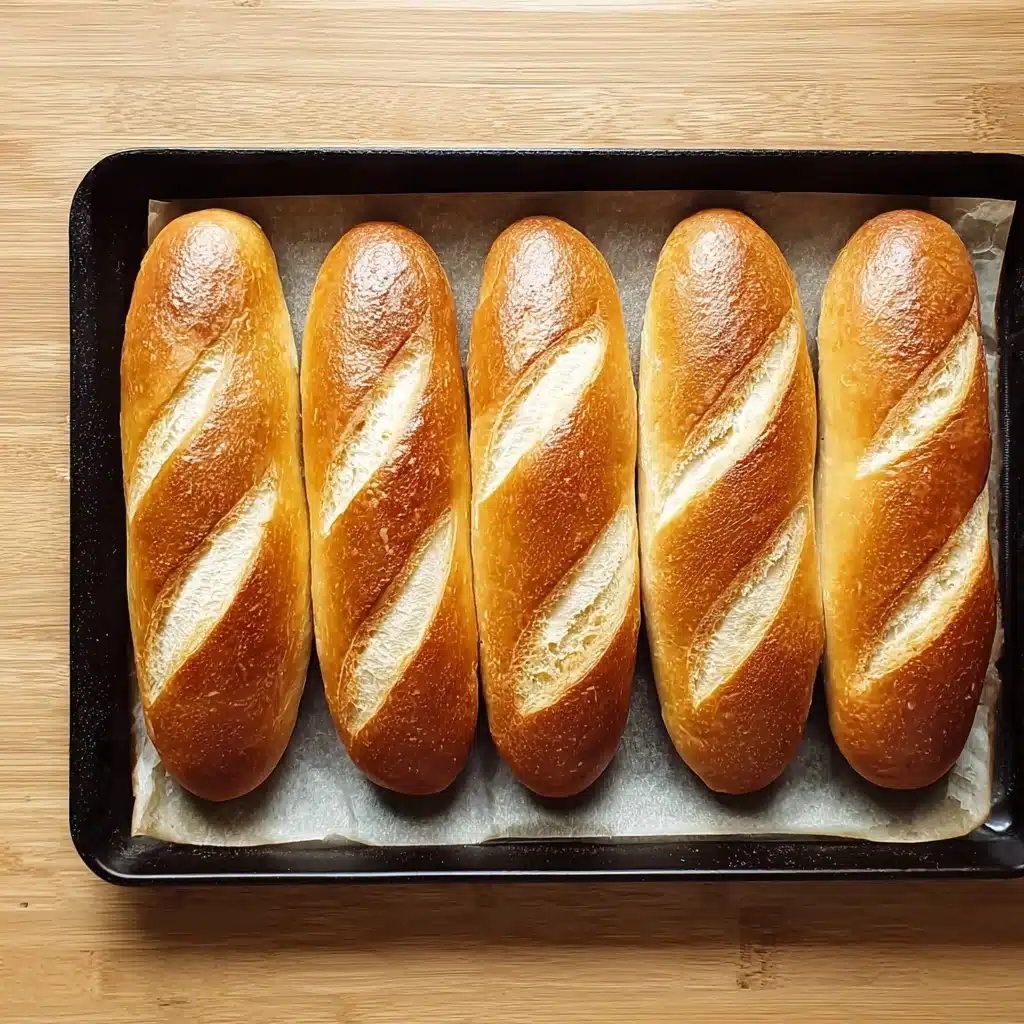
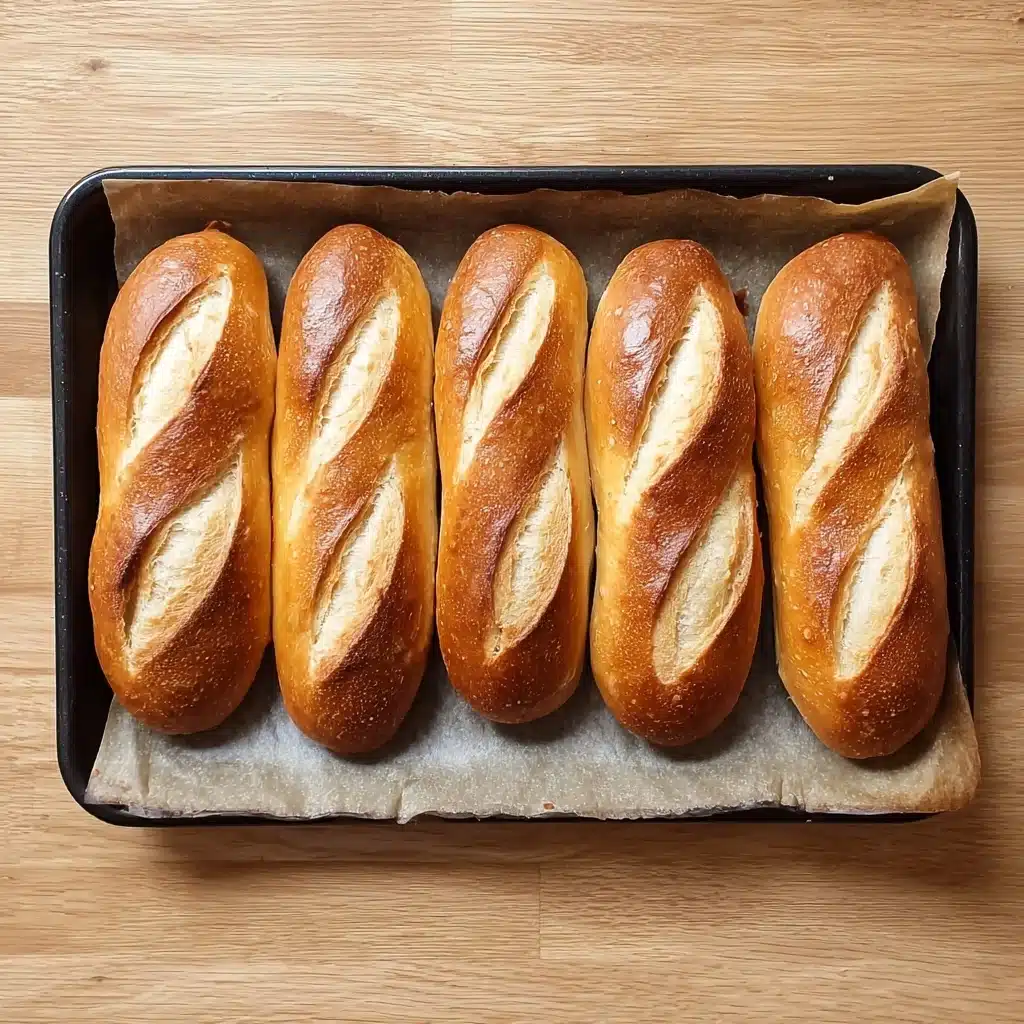
Preheat your oven to 400°F. Brush each roll with a glossy egg white wash to achieve a beautiful golden brown crust. Score the dough with three shallow cuts to give them that classic sub roll look. Bake for 15 to 20 minutes until perfectly golden or an internal temperature of 195 to 200°F is reached.
Step 9: Cooling
Remove your rolls from the oven and transfer them to a wire rack to cool completely before slicing. This allows the crumb to set and prevents a gummy texture in your sandwich.
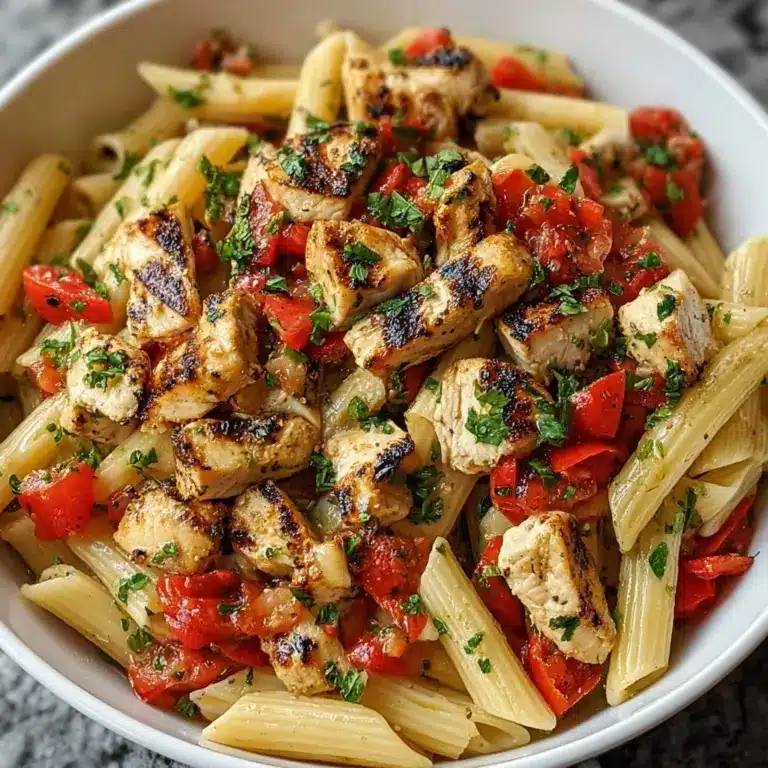
How to Serve Handmade Sub Rolls
Garnishes
While these Handmade Sub Rolls are delicious on their own, they truly shine when paired with crisp, fresh garnishes like lettuce, ripe tomatoes, and crunchy pickles. A smear of mayo or a drizzle of olive oil enhances their subtle flavor without overpowering the soft crumb.
Side Dishes
Handmade Sub Rolls pair beautifully with classic sides like potato chips, a crisp coleslaw, or a tangy pickle. For a heartier meal, consider grilled veggies or a simple cup of soup—comfort food at its best!
Creative Ways to Present
Try slicing the rolls horizontally and toasting them lightly for a warm, crisp surface that complements your fillings. You can also cut smaller rolls to create slider-sized subs for parties or casual gatherings, making these Handmade Sub Rolls versatile for any occasion.
Make Ahead and Storage
Storing Leftovers
Store leftover Handmade Sub Rolls in a sealed plastic bag or airtight container at room temperature for up to two days. This helps maintain their fresh-baked softness without drying out.
Freezing
To enjoy your Handmade Sub Rolls later, freeze them once completely cooled. Wrap each roll tightly in plastic wrap and place in a freezer-safe bag. They can last up to three months frozen without losing their delicious texture.
Reheating
Reheat frozen rolls by thawing them at room temperature, then warming in a 350°F oven for 5 to 7 minutes. This refreshes their crust and crumb, making them taste like freshly baked once again.
FAQs
Can I use all-purpose flour instead of bread flour?
While you can substitute all-purpose flour, bread flour is preferred because its higher protein content helps develop more gluten, resulting in the chewy texture that defines classic sub rolls.
Why do I need to use cold butter in the dough?
Cold butter helps create a tender crumb by coating flour proteins and slowing gluten development. This keeps the rolls soft while still giving structure and richness.
What’s the best way to check if the rolls are baked through?
For accuracy, use an instant-read thermometer to check that the internal temperature is between 195°F and 200°F. This ensures the bread is fully baked but still moist inside.
Can I make the dough by hand instead of a stand mixer?
Yes! You can mix and knead the dough by hand. It will take a bit more effort, especially during butter incorporation, but the results are just as delicious.
How long do the Handmade Sub Rolls stay fresh after baking?
They are best enjoyed within two days when stored properly. Beyond that, their texture may begin to stale, but freezing is an excellent option to extend freshness.
Final Thoughts
Making Handmade Sub Rolls at home is an incredibly satisfying experience that turns a simple sandwich into something extraordinary. Once you try these soft, buttery, perfectly risen rolls, you won’t want to go back to store-bought ones ever again. So, roll up your sleeves and bake these beauties—you’ll be amazed at how something so simple can make your meals truly memorable!
Print
Handmade Sub Rolls Recipe
- Total Time: 2 hours 10 minutes
- Yield: 6 sub rolls 1x
- Diet: Halal
Description
These Handmade Sub Rolls are soft, fluffy, and perfect for making delicious sandwiches at home. Crafted with a blend of bread flour, whole milk, eggs, and butter, they have a tender crumb and golden crust, ideal for house-made subs or hoagies.
Ingredients
Dough Ingredients
- 1 Cup Whole Milk (90℉)
- 2 ½ Tablespoons Granulated Sugar (30g)
- 2 Teaspoons (1 Packet) Active Dry Yeast (11g)
- 3 Cups Bread Flour (approx. 375g)
- 2 Teaspoons Fine Sea Salt (12g)
- 2 Eggs (Beaten)
- 3 Tablespoons Unsalted Butter (Cold, Cubed)
Egg Wash
- 1 Egg White (Beaten)
- 1 Tablespoon Water
Instructions
- Bloom the yeast: In a medium bowl, combine warm milk at 90°F, granulated sugar, and active dry yeast. Let it rest for 5 to 10 minutes until the mixture is frothy and bubbly, indicating the yeast is active.
- Mix dry ingredients: While the yeast blooms, mix bread flour and fine sea salt together in the bowl of your stand mixer to ensure even distribution of salt.
- Form initial dough: Add the frothy yeast mixture and beaten eggs to the flour and salt. Using a dough hook on low speed, knead for 3 to 5 minutes until the dough looks shaggy, scraping the bowl as needed.
- Incorporate butter: Add cold, cubed unsalted butter to the dough and knead for another 8 to 10 minutes on medium-low speed until the butter is fully incorporated and the dough is smooth and elastic. The dough ball should weigh roughly 880g.
- Shape and first rise: Transfer dough onto a lightly floured surface, shape into a tight ball. Lightly grease a large bowl, place dough inside turning to coat with oil, cover, and allow it to proof for 1 hour or until doubled in size.
- Divide and shape rolls: Punch down the risen dough on a lightly floured surface and divide it into six equal pieces (about 140g each). Roll each piece into a ball. Use a rolling pin to flatten each ball into a rectangle measuring around 9 inches wide by 5 inches tall, with thickness between ¼ to ½ inch. Starting at the long edge, roll tightly into a loaf shape, pinching the seams to seal. Place seam side down on a parchment-lined baking sheet.
- Second rise: Cover the shaped rolls with a damp cloth or a second baking sheet and let them rise for 30 minutes to puff up.
- Preheat oven: Preheat your oven to 400°F (204°C) as the dough proofs.
- Apply egg wash: Mix beaten egg white with water and gently brush the mixture evenly over the tops of each roll for a shiny golden crust.
- Score the rolls: Using a sharp knife, lame, or razor blade, score three shallow slashes about ¼ inch deep across each roll to allow oven spring and decorative appeal.
- Bake: Bake the rolls in the preheated oven for 15 to 20 minutes until they are golden brown and an instant-read thermometer inserted inside registers between 195°F to 200°F (90°C to 93°C).
- Cool: Remove the rolls from oven and transfer to a wire rack. Allow them to cool completely before slicing to maintain structure and texture.
Notes
- Use bread flour for optimal gluten development and chewiness, but all-purpose flour can be substituted with slightly different texture.
- Ensure milk is warmed to about 90°F; too hot may kill yeast, too cool will slow fermentation.
- Cold butter added during kneading enriches the dough and creates a soft crumb and tender crust.
- Proofing times may vary depending on room temperature; ensure dough doubles in size on first rise and is puffy on second rise.
- Egg wash provides a shiny, golden crust but can be omitted or replaced with milk for a softer crust.
- Allow rolls to cool completely to prevent gumminess when slicing.
- Prep Time: 20 minutes
- Cook Time: 15-20 minutes
- Category: Bread
- Method: Baking
- Cuisine: American
Nutrition
- Serving Size: 1 sub roll (approx. 140g)
- Calories: 260 kcal
- Sugar: 3 g
- Sodium: 280 mg
- Fat: 7 g
- Saturated Fat: 4 g
- Unsaturated Fat: 3 g
- Trans Fat: 0 g
- Carbohydrates: 40 g
- Fiber: 2 g
- Protein: 8 g
- Cholesterol: 60 mg
Keywords: sub rolls, sandwich rolls, handmade bread, homemade sub rolls, hoagie rolls, sandwich buns, bread rolls recipe


