
Holiday Peanut Butter Fudge Squares Recipe
Introduction
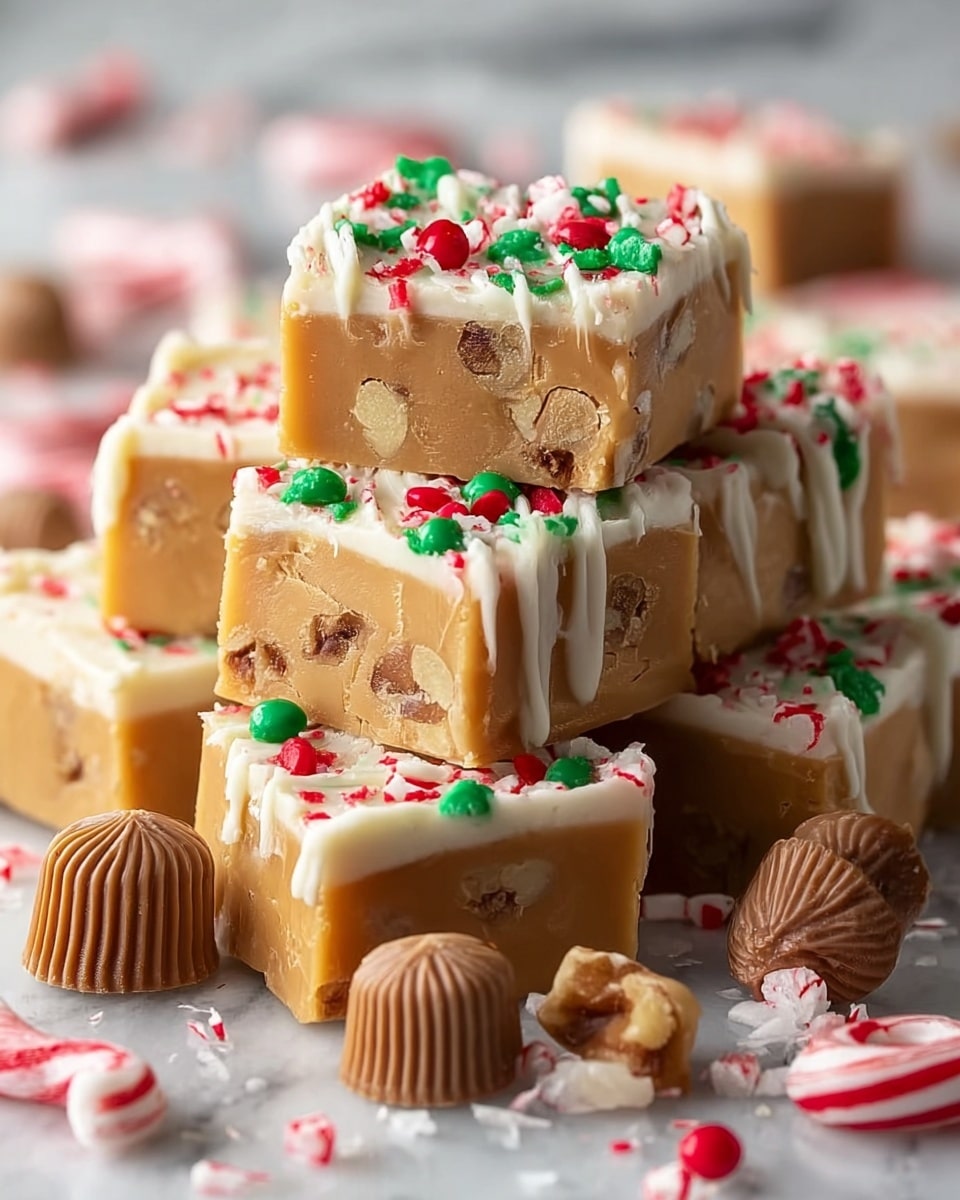
These Holiday Peanut Butter Fudge Squares are a festive treat perfect for sharing during the holiday season. Creamy, rich, and topped with crushed candy canes and sprinkles, they bring a delightful combination of flavors and colors to any celebration.
Ingredients
- ½ cup (1 stick / 113g) unsalted butter
- 1 cup (250g) creamy peanut butter
- 1 tsp vanilla extract
- 2 cups (240g) powdered sugar, sifted
- 1 cup (170g) white chocolate chips
- 1 tbsp heavy cream (or 1 tsp coconut oil for smooth melting)
- Crushed candy canes (about 3–4 candy canes)
- Red and green holiday sprinkles
- Optional: mini peanut butter cups for serving
Instructions
- Step 1: In a medium saucepan, melt the butter and peanut butter together over low heat, stirring continuously until smooth.
- Step 2: Remove the saucepan from heat and stir in the vanilla extract.
- Step 3: Add the sifted powdered sugar and mix until a thick, smooth dough forms.
- Step 4: Line an 8×8-inch baking dish with parchment paper for easy removal.
- Step 5: Press the peanut butter fudge mixture evenly into the prepared pan.
- Step 6: Smooth the top with a spatula to create an even surface.
- Step 7: Chill in the refrigerator for 30 minutes to allow the fudge to firm up.
- Step 8: Melt the white chocolate chips with heavy cream (or coconut oil) in the microwave in 20-second bursts, stirring until glossy and smooth.
- Step 9: Spread or drizzle the melted white chocolate over the chilled fudge base.
- Step 10: Immediately sprinkle crushed candy canes and holiday sprinkles on top before the chocolate sets.
- Step 11: Chill for 1 to 2 hours or until fully set and firm enough to slice.
- Step 12: Lift the fudge out of the pan using the parchment paper and slice into squares. Serve with optional mini peanut butter cups if desired.
Tips & Variations
- For a smoother fudge texture, be sure to sift the powdered sugar before mixing.
- Swap heavy cream for coconut oil to keep the white chocolate layer dairy-free.
- Try adding chopped nuts or a pinch of sea salt to the fudge base for extra flavor and texture.
- Use festive sprinkles and crushed peppermint to match your holiday decor and make the treat extra special.
Storage
Store the fudge squares in an airtight container in the refrigerator for up to 2 weeks. For longer storage, freeze them wrapped tightly in plastic wrap and kept in a freezer-safe container for up to 3 months. Allow frozen fudge to thaw in the refrigerator before serving. Reheating is not necessary and may affect texture.
How to Serve

Serve this delicious recipe with your favorite sides.
FAQs
Can I use crunchy peanut butter instead of creamy?
Yes, you can use crunchy peanut butter if you prefer a bit of texture in your fudge, but keep in mind it will change the smoothness of the final product.
How do I prevent the white chocolate from seizing while melting?
Melting the white chocolate with a small amount of heavy cream or coconut oil and stirring frequently in short microwave bursts helps keep it smooth and prevents seizing.
Print
Holiday Peanut Butter Fudge Squares Recipe
- Total Time: 1 hour 45 minutes
- Yield: 16 squares 1x
Description
These Holiday Peanut Butter Fudge Squares are a rich and festive treat combining creamy peanut butter, sweet powdered sugar, and a decadent white chocolate topping sprinkled with crushed candy canes and holiday sprinkles. Perfect for holiday parties, gifting, or a seasonal dessert, these no-bake fudge squares offer a delightful blend of smooth textures and crunchy festive decorations.
Ingredients
Fudge Base
- ½ cup (1 stick / 113g) unsalted butter
- 1 cup (250g) creamy peanut butter
- 1 tsp vanilla extract
- 2 cups (240g) powdered sugar, sifted
White Chocolate Topping
- 1 cup (170g) white chocolate chips
- 1 tbsp heavy cream (or 1 tsp coconut oil for smooth melting)
Decorations
- Crushed candy canes (about 3–4 candy canes)
- Red + green holiday sprinkles
- Optional: mini peanut butter cups for serving
Instructions
- Melt Butter and Peanut Butter: In a medium saucepan, melt the butter and creamy peanut butter together over low heat, stirring continuously until the mixture is smooth and fully combined to ensure no lumps remain.
- Add Vanilla: Remove the saucepan from heat and stir in the vanilla extract thoroughly to infuse the fudge with subtle flavor.
- Incorporate Powdered Sugar: Gradually add the sifted powdered sugar to the peanut butter mixture, stirring until a thick, smooth dough forms with no visible sugar granules.
- Prepare Baking Dish: Line an 8×8 inch baking dish with parchment paper ensuring some overhang to easily lift the fudge later.
- Press Fudge Mixture: Transfer the peanut butter fudge mixture into the lined baking dish and press it down evenly, smoothing the top surface with a spatula for an even layer.
- Chill to Firm Up: Place the dish in the refrigerator to chill for about 30 minutes until the fudge firms up sufficiently and holds shape.
- Melt White Chocolate Topping: In a microwave-safe bowl, combine white chocolate chips and heavy cream (or coconut oil). Heat in 20-second increments, stirring between each, until smooth and fully melted without overheating.
- Apply Topping: Spread or drizzle the melted white chocolate mixture evenly over the chilled peanut butter fudge base.
- Add Festive Decorations: Immediately sprinkle crushed candy canes and red and green holiday sprinkles over the white chocolate before it sets to ensure they stick well.
- Final Chill: Return the fudge to the refrigerator and chill for 1 to 2 hours until the topping is fully set and firm.
- Slice and Serve: Remove the fudge from the pan using the parchment paper overhang, place on a cutting board, and slice into squares. Serve with optional mini peanut butter cups on the side if desired.
Notes
- Ensure the powdered sugar is sifted to avoid lumps in the fudge base.
- Low heat when melting prevents scorching the butter and peanut butter.
- For a dairy-free option, substitute heavy cream with coconut oil as suggested.
- Press the fudge firmly into the pan to help it set properly and avoid crumbling.
- Chilling times may vary depending on refrigerator temperature, so allow extra time if needed.
- Store leftover fudge in an airtight container in the refrigerator for up to one week.
- Prep Time: 10 minutes
- Cook Time: 5 minutes
- Category: Dessert
- Method: Stovetop
- Cuisine: American
Keywords: holiday fudge, peanut butter fudge, Christmas dessert, no bake fudge, white chocolate fudge, festive treats


