
Perfect Dutch Oven Pumpkin Bread Recipe
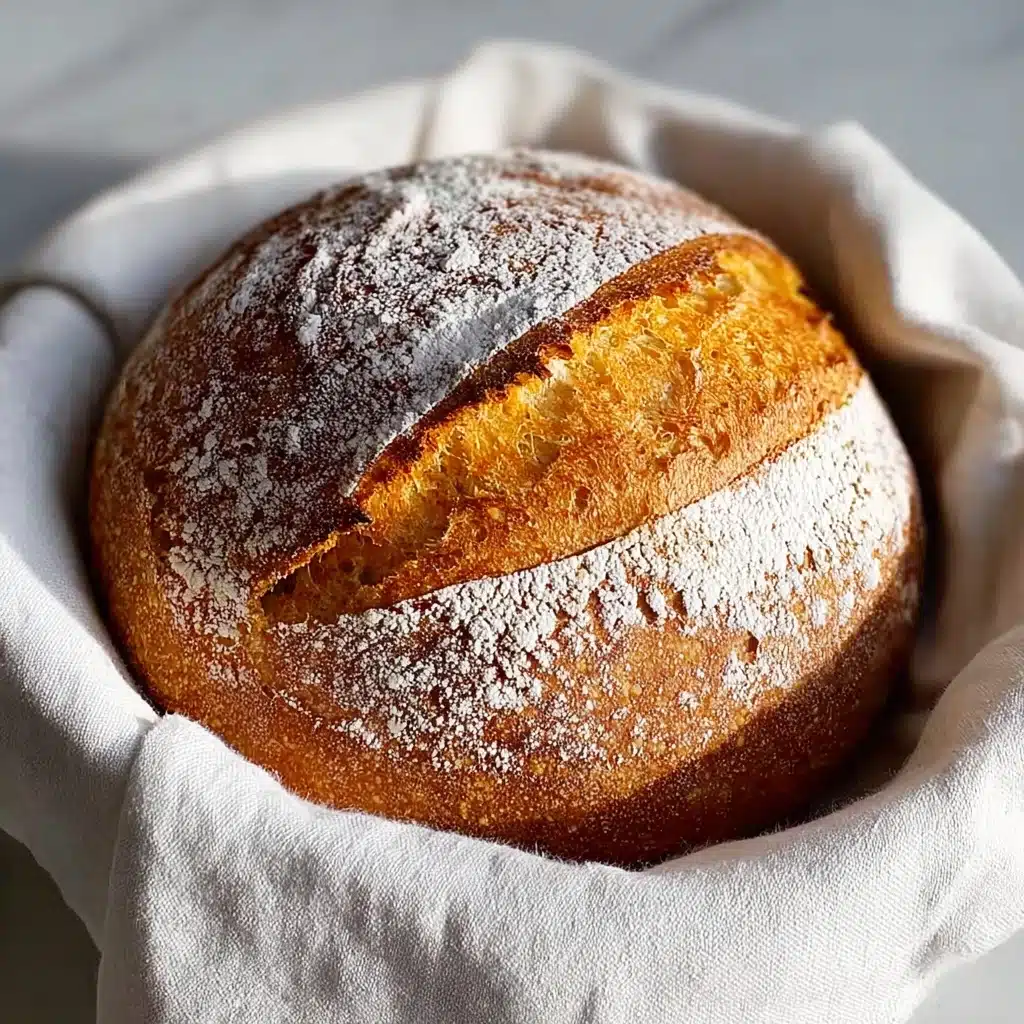
If you’re anything like me, autumn means cozy sweaters, soft scarves, and the magical aroma of fresh pumpkin baking in the oven. This Perfect Dutch Oven Pumpkin Bread is truly a treasure—moist, lightly spiced, and with that irresistibly tender crumb you only get from baking in a Dutch oven. Each bite sings with the natural sweetness of pumpkin, contrasted beautifully by a crisp, golden crust. Trust me, whether it’s for a Sunday brunch or afternoon tea, this bread feels like a warm hug you can slice and share.
Ingredients You’ll Need
The beauty of this recipe lies in its simplicity. Each ingredient is chosen carefully to contribute to the moistness, structure, and heavenly color of the bread. You don’t need a pantry full of fancy stuff—just a handful of essentials that come together like a comforting symphony.
- 3/4 cup cool water (180 g): Activates the yeast gently and melds with the pumpkin for tender crumb.
- 1/2 tsp active dry yeast: The magic agent transforming flour and pumpkin into fluffy bread; adjust to 1/4 tsp for an overnight rise.
- 1 cup pumpkin puree (225 g): The star of the show offering moisture, mild sweetness, and a gorgeous orange hue.
- 3 cups bread flour (425 g): Gives structure and chewiness, perfect for crafting that classic bread texture.
- 2 tsp fine sea salt: Balances flavors and enhances the pumpkin’s natural sweetness without overpowering it.
How to Make Perfect Dutch Oven Pumpkin Bread
Step 1: Activate the Yeast and Mix Pumpkin
Start by pouring the cool water into a large bowl and sprinkling the active dry yeast on top. Give it a gentle whisk or stir to dissolve, then let it sit for a few minutes—this gentle activation awakens the yeast without heating it, ensuring a perfect rise. Next, stir in the pumpkin puree, whisking until the mixture is smooth and lump-free. Taking the time here to blend well ensures every slice will have even color and flavor.
Step 2: Combine Flour and Salt with Pumpkin Mixture
Add the bread flour and fine sea salt to this vibrant pumpkin-yeast base. Start mixing with a rubber spatula, then switch to your hands to truly work the dough. The dough will feel sticky and a bit rustic—that’s exactly what we want. This texture promises a moist crumb that’s still sturdy enough to slice without crumbling.
Step 3: First Rise and Dough Folding
Cover the bowl with plastic wrap and leave it to rest at room temperature for about one hour. After this, wet your fingers and perform several folds by lifting the dough and folding it over itself. This step builds structure and evenly distributes air bubbles for a light, airy bread. Cover again and let it rise until it grows by roughly a third, which usually takes 3 to 4 hours. Don’t forget to gently pop any large bubbles you spot to keep your bread’s texture uniform.
Step 4: Chill the Dough Overnight
Transfer the bowl to the fridge for a 12-hour chill (or leave overnight). This slow fermentation deepens flavor and makes the dough easier to handle later. The patience here rewards you with a bread that tastes like it took hours in a fancy bakery.
Step 5: Shape and Final Rise
Next morning, lightly flour your workspace and gently tip the chilled dough out. Using floured hands, tuck the edges underneath to shape a tight, round loaf. Set the dough on a piece of parchment paper and dust the top with flour. Cover with a tea towel and let it rise at room temperature until it puffs up about 3 to 4 hours. Don’t rush this step—good things take time, and so does perfect texture!
Step 6: Prepare Dutch Oven and Score Dough
Preheat your oven to 450°F (230°C) with the Dutch oven inside to get it smoking hot. After it’s fully heated (about 10-20 minutes), score the top of your dough with a shallow slash using a sharp paring knife. This slash allows your bread to expand gracefully during baking, giving you that signature bakery loaf look.
Step 7: Bake the Bread
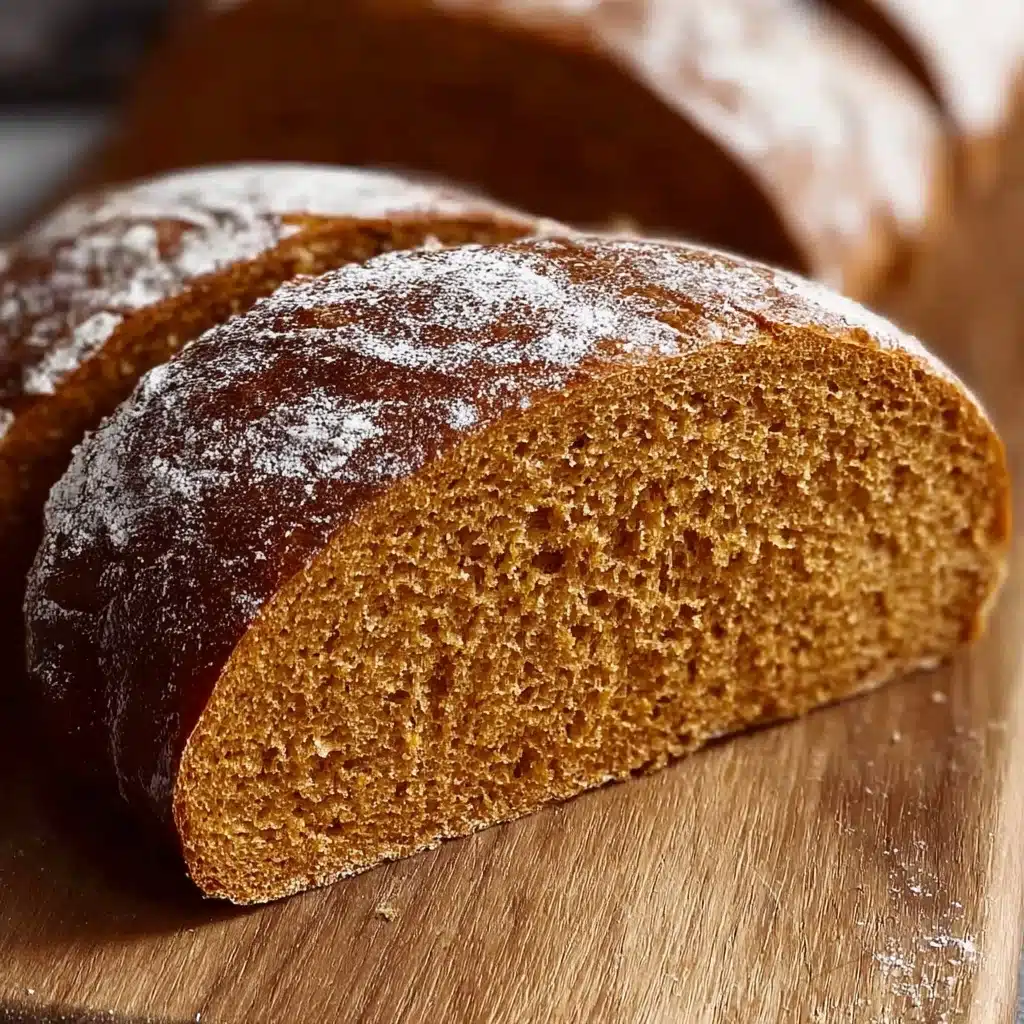
Carefully transfer the dough with the parchment paper into the hot Dutch oven and cover with the lid. Bake covered for 20 minutes, then remove the lid to let the crust turn a deep golden brown, baking uncovered for another 20 to 25 minutes. The result will be a robust crust that crunches lightly when you bite, while inside the crumb remains pillowy soft.
Step 8: Cool and Enjoy
Once baked, take the bread out of the Dutch oven and cool it completely on a wire rack. Resist cutting too soon—waiting at least an hour allows the crumb to set beautifully and lets the flavors shine fully. Trust me, the patience here is key to savoring this Perfect Dutch Oven Pumpkin Bread at its very best.
How to Serve Perfect Dutch Oven Pumpkin Bread
Garnishes
Though this pumpkin bread stands proudly on its own, a pat of whipped cinnamon butter or a drizzle of honey pairs wonderfully to enhance its subtle sweetness. Toasting a slice lightly and sprinkling with a pinch of flaky sea salt creates an irresistible sweet-salty flavor dance. Fresh herbs like a tiny sprig of rosemary or thyme can even elevate your presentation if you’re feeling fancy.
Side Dishes
This bread makes an excellent accompaniment to hearty fall soups like butternut squash bisque or spiced lentil stew. It also complements creamy cheeses such as mascarpone or brie, making it perfect for cozy grazing boards. If you’re serving brunch, pair with scrambled eggs or smoked salmon for a delightful spread that feels both homey and special.
Creative Ways to Present
Want to wow your guests? Slice the bread into thick pieces and serve as open-faced sandwiches with fall-inspired toppings: cream cheese and cranberry compote, or nut butter with sliced apples and a sprinkle of cinnamon. You can also cube leftover bread and bake it into crunchy pumpkin-spiced croutons, perfect for autumn salads. The versatile charm of this Perfect Dutch Oven Pumpkin Bread means the presentation possibilities are endless!
Make Ahead and Storage
Storing Leftovers
Once cooled completely, wrap your pumpkin bread tightly in plastic wrap or keep it in an airtight container to retain freshness. Stored at room temperature, it stays moist and tasty for up to 3 days. If your kitchen is warm or humid, consider refrigeration to keep it from drying out.
Freezing
This bread freezes beautifully. Slice it first for convenience, then layer pieces between parchment paper in a freezer-safe bag, removing as much air as possible. Frozen slices will keep well for up to 3 months. When you’re ready to enjoy, simply thaw at room temperature or pop them straight into a toaster or low oven.
Reheating
To bring your Perfect Dutch Oven Pumpkin Bread back to life, warm slices gently in a toaster oven or a preheated oven at 325°F (160°C) for 5-7 minutes. This reheating method revives the crust’s crispness while keeping the inside wonderfully soft and fragrant, making it taste just-baked again.
FAQs
Can I use canned pumpkin or fresh pumpkin puree?
Both canned and fresh pumpkin puree work well in this recipe. Canned pumpkin is convenient and consistent, while fresh puree offers a slightly more vibrant flavor. Just make sure your puree is smooth and not watery for best results.
What if I don’t have a Dutch oven? Can I use a baking sheet?
While a Dutch oven creates the perfect environment for steam and heat circulation, you can bake this bread on a baking sheet. Cover the dough loosely with a large oven-safe bowl or tent foil over it during the first part of baking to mimic the steam effect, then remove the cover to crisp the crust.
Why does the dough need to chill overnight?
The overnight chill slows fermentation, enhancing the flavor complexity and giving the gluten a chance to relax, which results in a softer, more flavorful bread. It also makes handling the dough easier when shaping.
Can I add spices like cinnamon or nutmeg to this bread?
Absolutely! Adding warm spices such as cinnamon, nutmeg, or a pinch of ginger complements the pumpkin beautifully. Start with about 1 teaspoon of cinnamon or a blend of your favorite fall spices mixed into the dry ingredients.
How do I know when the bread is fully baked?
The crust should be deeply golden brown and firm to the touch. You can also gently tap the bottom of the loaf—it should sound hollow. Using a kitchen thermometer, an internal temp of about 200°F (93°C) ensures it’s perfectly baked through.
Final Thoughts
This Perfect Dutch Oven Pumpkin Bread is so much more than just a recipe; it’s a celebration of cozy moments and simple pleasures. I hope you find as much joy baking and sharing it as I do savoring every bite. Pumpkin season only comes once a year, so dive into this delight and let your kitchen fill with warming scents and smiles!
Print
Perfect Dutch Oven Pumpkin Bread Recipe
- Total Time: 16 hours 5 minutes (including rises and chilling)
- Yield: 1 loaf (about 12–16 slices) 1x
- Diet: Vegetarian
Description
This Perfect Dutch Oven Pumpkin Bread recipe yields a moist, tender loaf infused with the natural sweetness and earthy flavor of pumpkin. Crafted with bread flour for structure and baked in a preheated Dutch oven, the bread develops a golden, crusty exterior with a soft, airy crumb. Ideal for autumn mornings or as a cozy snack, this bread combines simple ingredients with a slow, overnight rise for enhanced flavor and texture.
Ingredients
Wet Ingredients
- 3/4 cup cool water (180 g)
- 1 cup pumpkin puree (225 g)
- 1/2 tsp active dry yeast (use 1/4 tsp for overnight rise)
Dry Ingredients
- 3 cups bread flour (425 g)
- 2 tsp fine sea salt
Instructions
- Activate Yeast: In a large bowl, pour in the cool water and sprinkle the active dry yeast on top. Whisk or stir gently to dissolve the yeast, then let it sit for a few minutes to activate.
- Combine Pumpkin Puree: Add the pumpkin puree and whisk until the mixture becomes a smooth, orange liquid without any lumps remaining, ensuring thorough mixing to avoid unmixed puree pockets.
- Mix Dry Ingredients: Add bread flour and fine sea salt to the wet mixture. Stir initially with a rubber spatula, then use your hands to squeeze and fold the dough until all flour is absorbed and the dough is evenly mixed. The dough will be sticky.
- First Rise: Cover the bowl with plastic wrap and leave at room temperature for one hour. Then, wet your fingers and perform several dough folds by lifting dough from one side and folding it over itself until it tightens. Cover again and let rise for another 3-4 hours until the dough increases in volume by about one third. Pop any large air bubbles to maintain even texture.
- Chill Dough: Transfer the bowl to the fridge and chill the dough for about 12 hours or overnight to rest and develop flavor.
- Shape Dough: The next morning, gently transfer the chilled dough onto a floured work surface. Using floured hands, shape it into a tight, round ball by tucking edges underneath and rounding with your hands. Place the dough on a small square of parchment paper and dust lightly with flour.
- Second Rise: Cover the shaped dough with a tea towel and let rise at room temperature for 3-4 hours until puffy and slightly expanded, ensuring a light and airy loaf.
- Preheat Dutch Oven: Place a 4-6 quart Dutch oven in your oven and preheat to 450°F (230°C). Leave the Dutch oven inside for an additional 10-20 minutes to ensure thorough heating.
- Score Dough: Use a sharp paring knife to quickly make a shallow slash about ½ cm deep on top of the risen dough. This helps the bread expand evenly during baking.
- Bake Covered: Carefully remove the Dutch oven from the oven and transfer the dough with parchment paper into it. Cover with the lid and bake on the center rack for 20 minutes.
- Bake Uncovered: Remove the lid and continue to bake for another 20-25 minutes until the bread is deeply golden and the crust is firm to the touch.
- Cool Bread: Remove bread from the Dutch oven and place on a rack to cool for at least one hour before slicing. This resting time allows the crumb to set and flavor to develop fully.
Notes
- For an overnight rise, reduce active dry yeast to 1/4 tsp to prevent over-proofing.
- Make sure to thoroughly whisk the pumpkin puree into the water and yeast mixture to avoid lumps in the dough.
- Performing folds during the first rise helps develop gluten and structure in the dough.
- Chilling the dough overnight enhances flavor and allows for a more manageable dough during shaping.
- Allowing adequate time for the second rise is essential for a light, airy loaf.
- Preheating the Dutch oven and keeping it hot ensures a crisp crust and even baking.
- Use a sharp knife for scoring to achieve a clean slash that controls bread expansion.
- Patience in cooling the bread prevents crumb from becoming gummy and improves slicing.
- Prep Time: 20 minutes
- Cook Time: 45 minutes
- Category: Bread
- Method: Baking (Dutch Oven)
- Cuisine: American
Nutrition
- Serving Size: 1 slice (1/16th of loaf)
- Calories: 130 kcal
- Sugar: 1.2 g
- Sodium: 220 mg
- Fat: 0.5 g
- Saturated Fat: 0.1 g
- Unsaturated Fat: 0.3 g
- Trans Fat: 0 g
- Carbohydrates: 27 g
- Fiber: 2 g
- Protein: 4 g
- Cholesterol: 0 mg
Keywords: pumpkin bread, Dutch oven bread, autumn bread, homemade bread, no-knead bread, pumpkin puree, fall baking


