
Red Velvet Cookies Recipe
Introduction
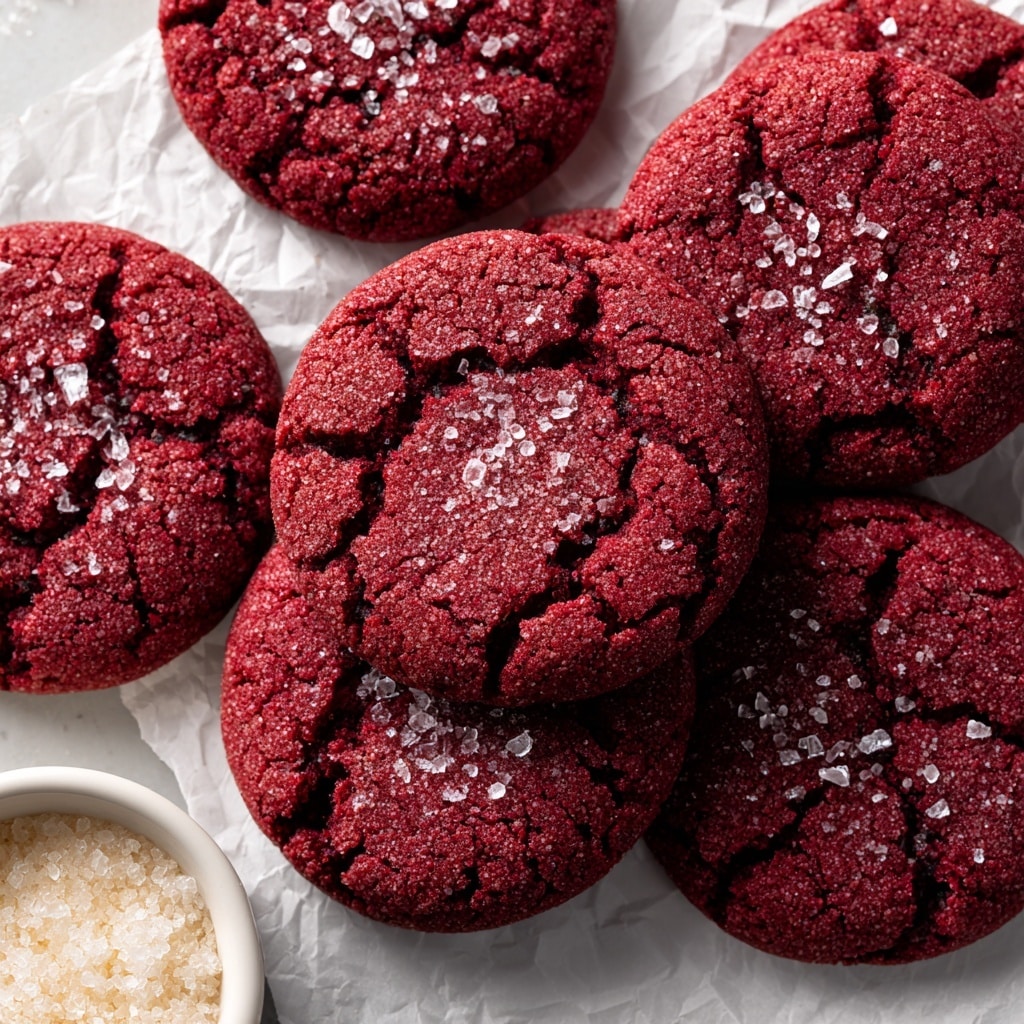
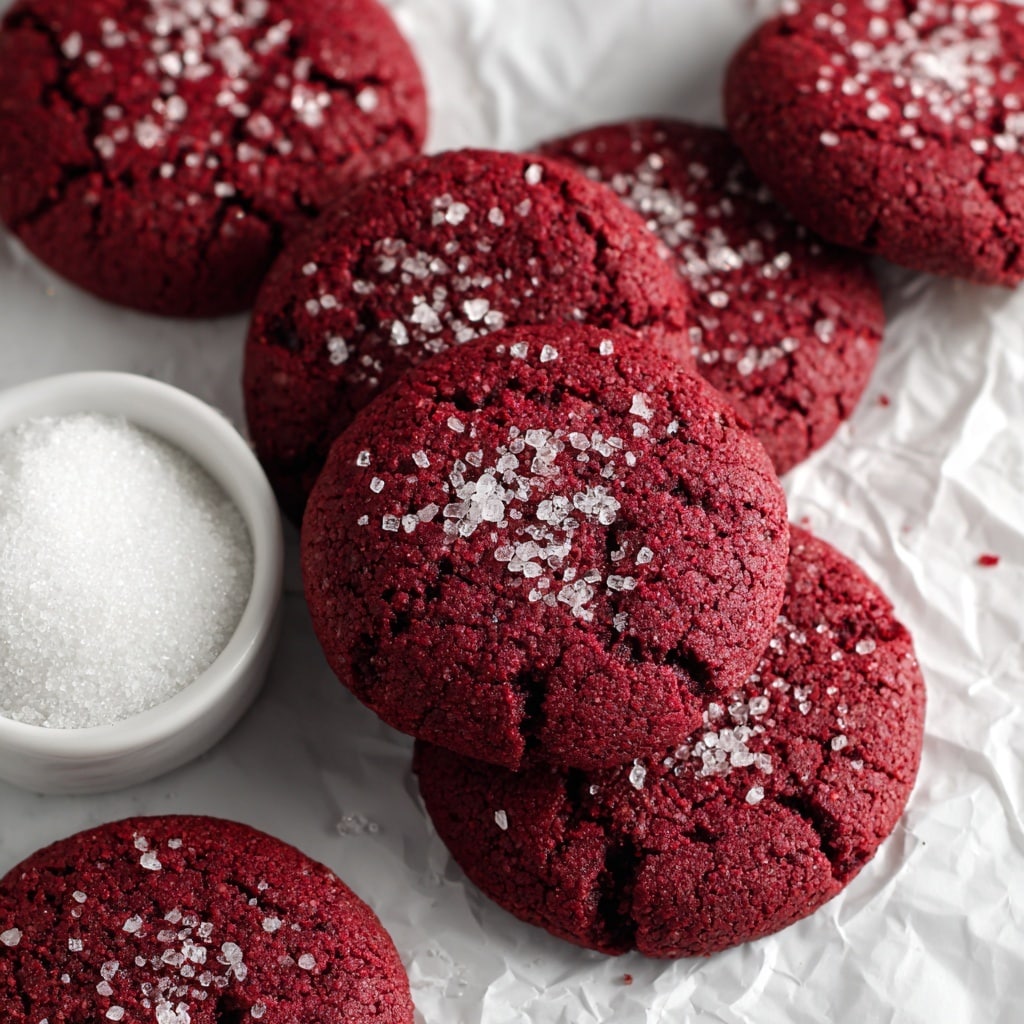
Red velvet cookies are a delightful twist on a classic dessert, combining the rich flavor of cocoa with a vibrant red color. These soft, slightly chewy cookies are perfect for any occasion and sure to impress your family and friends.
Ingredients
- 1/2 cup (113 g) unsalted butter
- 1/2 cup plus 1 tablespoon (110 g) light brown sugar
- 1/4 cup (50 g) granulated sugar
- 1 large egg, room temperature
- 1 1/2 teaspoons vanilla extract
- 1 1/2 teaspoons red gel food coloring
- 1 1/4 cups (160 g) all-purpose flour
- 2 tablespoons cocoa powder, sifted (Dutch-process or Hershey’s Special Dark recommended)
- 1/2 teaspoon baking soda
- 1/2 teaspoon baking powder
- 1/2 teaspoon salt
- 1/2 cup red sanding sugar for rolling
- 1/4 cup (50 g) granulated or coarse sugar
- Dollop of red gel food coloring (do not use liquid food coloring)
Instructions
- Step 1: Melt the butter in a small saucepan over medium-low heat or in the microwave. Pour the melted butter onto a shallow bowl or plate and place in the freezer for 5 to 8 minutes. Do not let it solidify completely.
- Step 2: Transfer the cooled melted butter to a medium mixing bowl. Add the light brown sugar, granulated sugar, egg, vanilla extract, and red gel food coloring. Whisk thoroughly until well combined.
- Step 3: In a separate bowl, whisk together the all-purpose flour, sifted cocoa powder, baking soda, baking powder, and salt.
- Step 4: Add the dry ingredients to the butter and egg mixture. Use a large spatula to gently fold everything together until just combined. Avoid over mixing to keep the cookies tender.
- Step 5: Preheat your oven to 350°F (175°C) and line two baking sheets with parchment paper. Let the dough rest while the oven heats.
- Step 6: Using a medium cookie scoop, portion the dough into approximately 2-ounce balls. Roll each ball in red sanding sugar and place on the prepared baking sheets, spacing them 2 to 3 inches apart.
- Step 7: Bake for 9 to 10 minutes, until the edges are set but the centers remain slightly puffed and underbaked. Remove from oven and optionally sprinkle with more sugar. Cookies will deflate as they cool.
- Step 8: To make the red sanding sugar, preheat the oven to 250°F (120°C) and line a large baking sheet with parchment paper.
- Step 9: Place 1/4 cup granulated sugar and a dollop of red gel food coloring into a large plastic bag. Seal and shake, then massage with your hands until the sugar is evenly colored.
- Step 10: Sift the colored sugar through a fine mesh strainer into a bowl to remove clumps. Repeat the sifting until the sugar looks uniformly colored.
- Step 11: Spread the sifted sugar evenly on the prepared baking sheet. Bake for 10 minutes, then remove and cool completely for at least 15 minutes before using.
Tips & Variations
- Use gel food coloring instead of liquid to maintain dough consistency and intense color.
- For extra moisture, try adding a tablespoon of sour cream to the dough.
- Substitute the cocoa powder with natural or Dutch-processed depending on your flavor preference.
- Store unused red sanding sugar in an airtight container for future use.
- For a playful twist, add mini white chocolate chips or chopped pecans to the dough before baking.
Storage
Store the red velvet cookies in an airtight container at room temperature for up to 5 days. To refresh, warm them briefly in the microwave for about 10 seconds. For longer storage, freeze the cookies in a sealed container for up to 3 months; thaw at room temperature before serving.
How to Serve
Serve this delicious recipe with your favorite sides.
FAQs
Can I use liquid food coloring instead of gel?
It is not recommended as liquid food coloring can alter the dough consistency, making it too wet. Gel food coloring provides vibrant color without affecting the texture.
How do I know when the cookies are done?
Look for edges that are set, while centers remain slightly puffed and soft. The cookies should not be browned or fully firm, as they will continue to set as they cool.
Print
Red Velvet Cookies Recipe
- Total Time: 40 minutes
- Yield: About 12 medium-sized cookies 1x
Description
These Red Velvet Cookies feature a rich, velvety texture with a deep cocoa flavor and a vibrant red color. Rolled in homemade red sanding sugar, they offer a delightful crunch and a visually stunning finish. Perfect for festive occasions or anytime you crave a twist on classic red velvet cake in cookie form.
Ingredients
Cookies
- 1/2 cup (113 g) unsalted butter
- 1/2 cup plus 1 tablespoon (110 g) light brown sugar
- 1/4 cup (50 g) granulated sugar
- 1 large egg, room temperature
- 1 1/2 teaspoons vanilla extract
- 1 1/2 teaspoons red gel food coloring
- 1 1/4 cups (160 g) all-purpose flour
- 2 tablespoons cocoa powder, sifted (Dutch-process or Hershey’s Special Dark)
- 1/2 teaspoon baking soda
- 1/2 teaspoon baking powder
- 1/2 teaspoon salt
- 1/2 cup red sanding sugar for rolling
Red Sanding Sugar
- 1/4 cup (50 g) granulated or coarse sugar
- dollop of red gel food coloring (do not use liquid food coloring)
Instructions
- Melt Butter: In a small saucepan over medium-low heat, melt the butter. Alternatively, melt it in the microwave. Pour melted butter onto a shallow bowl or plate and place in the freezer for 5 to 8 minutes until slightly cooled but not solidified.
- Mix Wet Ingredients: Transfer the cooled melted butter into a medium mixing bowl. Add the light brown sugar, granulated sugar, egg, vanilla extract, and red gel food coloring. Whisk thoroughly to combine all ingredients evenly.
- Combine Dry Ingredients: In a separate bowl, whisk together the all-purpose flour, sifted cocoa powder, baking soda, baking powder, and salt to ensure even distribution.
- Form Dough: Add the dry ingredients to the wet mixture. Using a large spatula, gently fold the ingredients together just until combined. Avoid over mixing to maintain tender cookies.
- Preheat Oven and Prepare Baking Sheets: Let the dough rest briefly while preheating your oven to 350°F (175°C). Line two baking sheets with parchment paper.
- Scoop and Roll Dough: Use a medium cookie scoop to portion the dough into approximately 2-ounce balls. Roll each ball in red sanding sugar to coat thoroughly. Place on the prepared baking sheets, spacing cookies 2 to 3 inches apart to allow for spreading.
- Bake Cookies: Bake for 9 to 10 minutes until the edges are set but the centers remain slightly puffed and under baked. Do not over bake to retain softness. Remove from oven and optionally sprinkle with extra sanding sugar. Cookies will flatten slightly as they cool.
- Prepare Red Sanding Sugar: Preheat oven to 250°F (120°C). Line a large baking sheet with parchment paper.
- Color Sugar: Combine 1/4 cup granulated sugar and a dollop of red gel food coloring in a large plastic bag. Shake and knead the bag to evenly distribute the color until all sugar grains are coated.
- Sift Colored Sugar: Sift the colored sugar through a fine mesh strainer into a medium bowl to remove clumps. Repeat sifting several times until sugar appears uniform in color and texture.
- Bake Colored Sugar: Spread the sifted sugar evenly on the prepared baking sheet. Bake for 10 minutes to set the color and dry the sugar.
- Cool Sugar: Remove sugar from oven and allow it to cool completely for at least 15 minutes before using it to roll or sprinkle on cookies.
Notes
- Do not over bake cookies; centers should remain soft and slightly puffed for the ideal texture.
- Use gel food coloring to achieve vibrant color without adding extra liquid to the dough.
- Sifting cocoa powder and flour ensures even mixing and a tender crumb.
- Red sanding sugar can be prepared in advance and stored in an airtight container for weeks.
- Allow melted butter to cool slightly before mixing to prevent cooking the egg prematurely.
- Prep Time: 20 minutes
- Cook Time: 10 minutes
- Category: Dessert
- Method: Baking
- Cuisine: American
Keywords: red velvet cookies, red velvet dessert, holiday cookies, baking cookies, red sanding sugar, cocoa cookies


