
Salt Dough Ornaments Recipe
Introduction
Create charming, personalized decorations with this easy salt dough ornament recipe. With just a few simple ingredients, you can craft beautiful keepsakes perfect for holidays or gifts.
Ingredients
- 2 cups all-purpose flour
- 1 cup salt
- ¾ cup water (more if needed)
Instructions
- Step 1: Preheat your oven to 200°F (93°C).
- Step 2: In a large mixing bowl or stand mixer, whisk together the flour and salt until well combined.
- Step 3: Gradually add water over medium-low mixer speed, reserving a few tablespoons. Mix until the dough is just moist and combined. Add any remaining water 1 tablespoon at a time as needed.
- Step 4: On a lightly floured surface, knead the dough by hand or use the dough hook on your mixer until smooth. The longer you knead, the smoother your dough and finished ornaments will be.
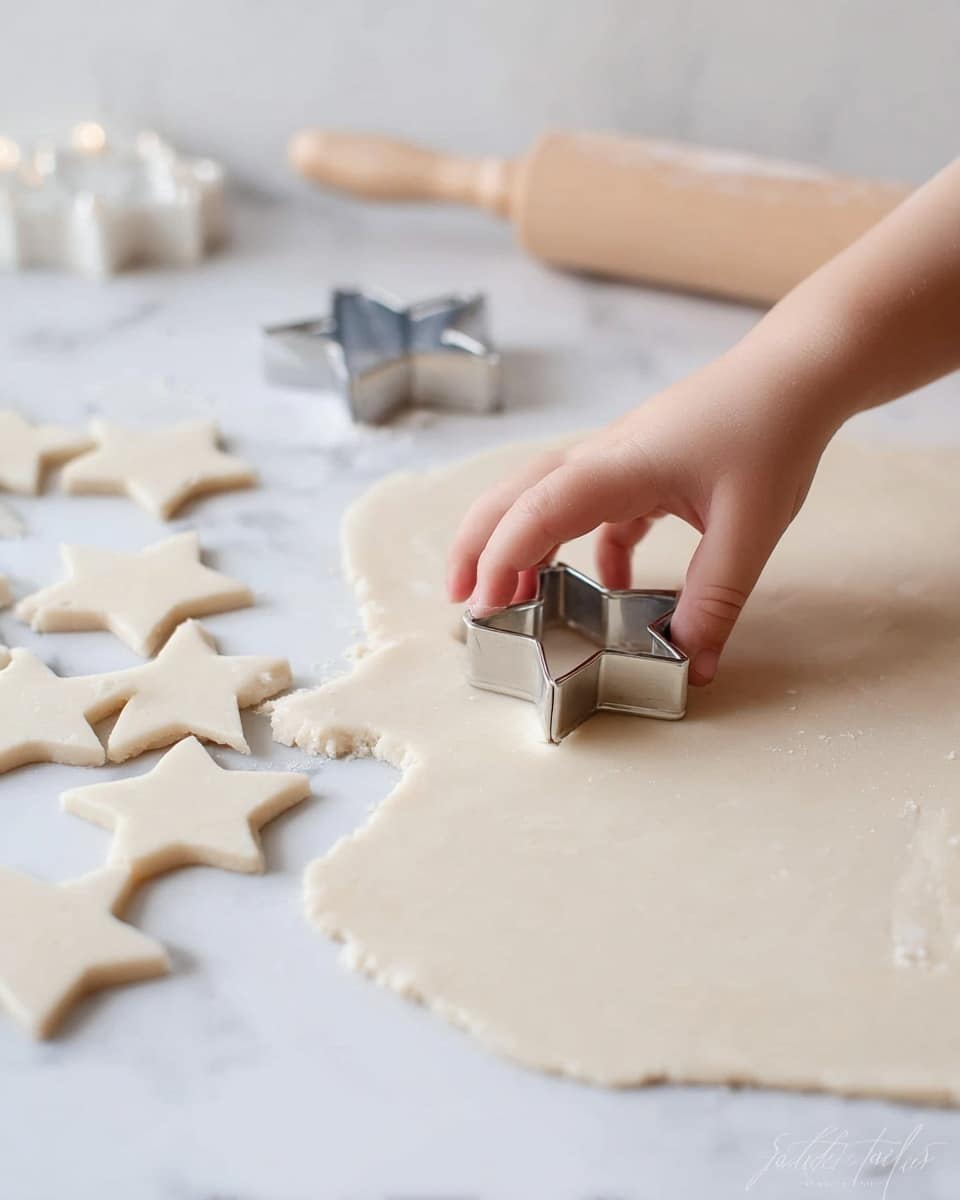
- Step 5: Secure a sheet of parchment paper to your working surface, then roll the dough to about ¼ inch thick for ornaments or ⅓ inch thick for handprints and footprints. You can also roll directly on a lightly floured surface.
- Step 6: Use cookie cutters to cut out shapes from the rolled dough. To create a hole for hanging, press a straw into the dough shape before baking.
- Step 7: Transfer the parchment paper with the dough shapes onto a baking sheet. Bake for 20 minutes, then gently flip each ornament using a cookie spatula and bake for an additional 10 minutes or until dry.
- Step 8: Remove from oven and allow ornaments to cool completely before decorating or using.
Tips & Variations
- For a smoother texture, knead the dough longer before rolling it out.
- Add a few drops of food coloring to the water for tinted dough.
- Once baked and cooled, decorate with acrylic paints or permanent markers.
- To make your ornaments last longer, seal them with a clear acrylic spray or varnish.
Storage
Store completed salt dough ornaments in an airtight container or wrapped in tissue paper to prevent moisture damage. They can last for several months when kept dry. If storing raw dough, wrap tightly in plastic wrap and refrigerate for up to a week. To refresh dried ornaments, you may gently re-bake at low temperature before decorating.
How to Serve

Serve this delicious recipe with your favorite sides.
FAQs
Can I use sea salt instead of table salt?
Yes, sea salt works fine and can give a slightly different texture, but regular fine salt is best for a smooth dough.
What if my dough is too sticky or too dry?
If the dough is too sticky, add a little more flour, a tablespoon at a time. If it’s too dry and crumbly, add water slowly until the dough holds together.
Print
Salt Dough Ornaments Recipe
- Total Time: 45 minutes
- Yield: Approximately 20 medium-sized ornaments 1x
Description
Create charming and easy salt dough ornaments with just flour, salt, and water. This simple recipe allows you to craft personalized decorations perfect for holidays or keepsakes, using minimal ingredients and baking in your oven for a long-lasting, customizable finish.
Ingredients
Salt Dough Ingredients
- 2 cups all-purpose flour
- 1 cup salt
- ¾ cup water, more if needed
Instructions
- Preheat the Oven: Begin by preheating your oven to 200°F (93°C) to prepare for baking the ornaments.
- Combine Dry Ingredients: In a large mixing bowl or stand mixer, whisk together the all-purpose flour and salt until well combined.
- Add Water Gradually: Slowly add the ¾ cup of water to the dry mixture while mixing on medium-low speed, reserving a few tablespoons. Add the reserved water one tablespoon at a time if the dough feels too dry, mixing until just moist.
- Knead the Dough: On a lightly floured surface or using a stand mixer fitted with a dough hook, knead the dough until it becomes smooth. The longer you knead, the smoother your dough and resulting ornaments will be.
- Roll Out the Dough: Secure a sheet of parchment paper to your work surface, then roll out the dough to about ¼ inch thickness for ornaments or ⅓ inch for handprints and footprints. Alternatively, lightly flour your work surface before rolling.
- Cut and Punch Holes: Use cookie cutters to gently press shapes into the dough. Use a straw to punch a small hole near the top of each shape to allow for hanging the ornament later.
- Bake the Ornaments: Transfer the parchment paper with dough shapes onto a cookie sheet. Bake in the preheated oven for 20 minutes.
- Flip and Continue Baking: Carefully flip each ornament using a cookie spatula and bake for an additional 10 minutes, or until the ornaments are completely dry.
- Cool Completely: Remove from the oven and allow ornaments to cool completely before decorating or displaying.
Notes
- If the dough feels too sticky, gradually add a little more flour while kneading.
- Ensure the hole for hanging is large enough for your strings or ribbons.
- You can decorate the ornaments after baking using paint, glitter, or varnish for added durability.
- Store finished ornaments in an airtight container to keep them dry and intact.
- Adjust baking time slightly for thicker or larger ornaments to ensure thorough drying.
- Prep Time: 15 minutes
- Cook Time: 30 minutes
- Category: Dessert
- Method: Baking
- Cuisine: American
Keywords: salt dough, homemade ornaments, craft ornaments, baking crafts, holiday decorations, DIY ornaments


