
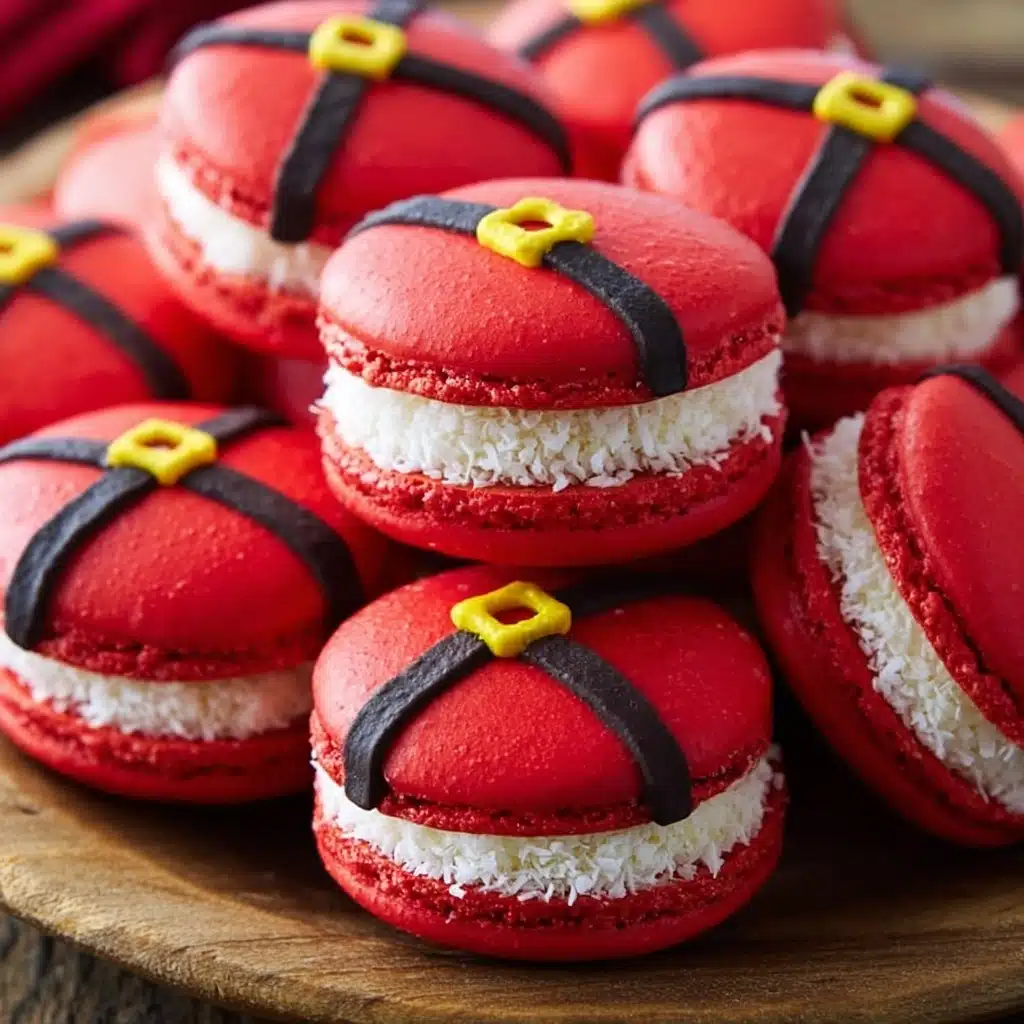
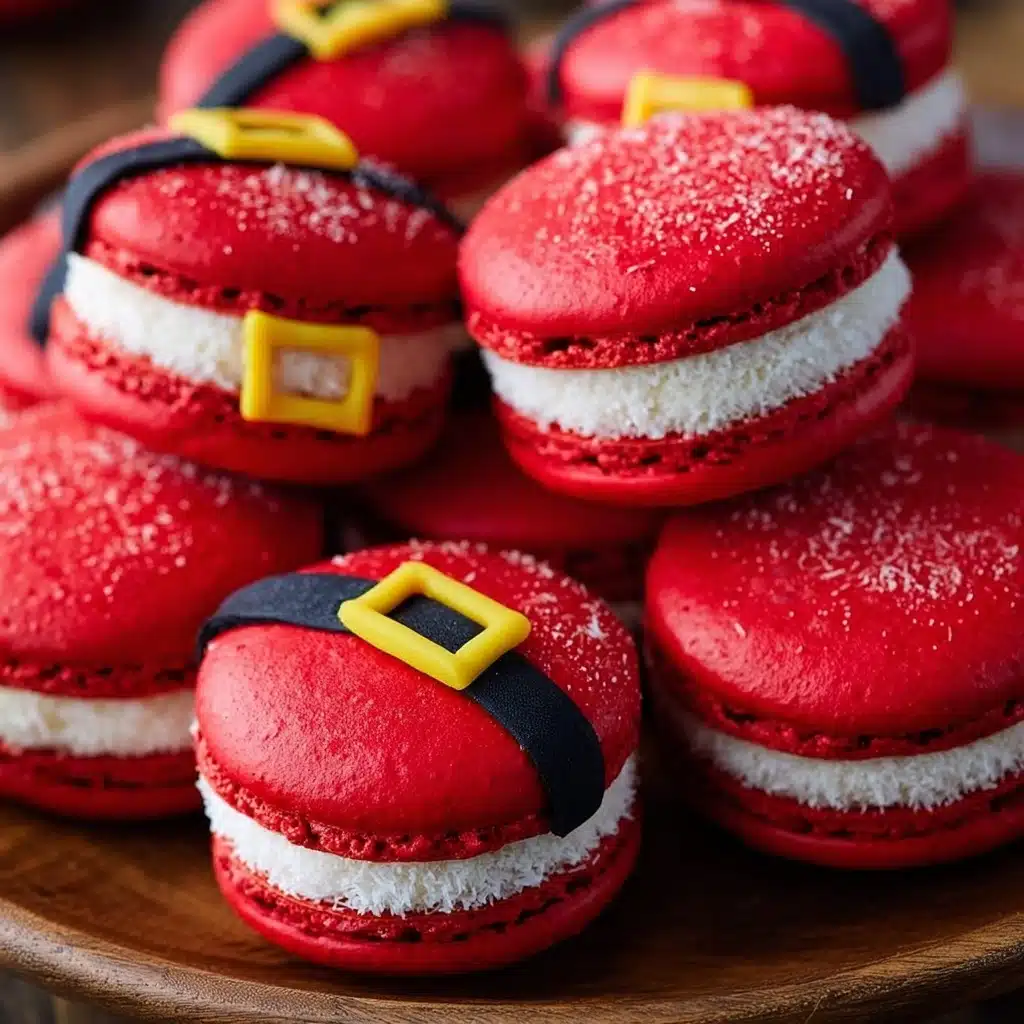
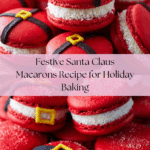
Santa Claus Macarons Recipe
If you’re looking for a festive treat that’s both charming and delicious, these Santa Claus Macarons are an absolute delight to make and share. With their adorable red shells dressed up as jolly Saint Nick, and a luscious sugar cookie buttercream filling, these macarons will bring smiles to any holiday gathering. These Santa Claus Macarons strike the perfect balance of sweet, nutty, and creamy, while the delicate texture of the shells combined with the rich filling creates a heavenly bite every time. Whether you’re gifting them or indulging yourself, this recipe is sure to become a treasured Christmas tradition.
Ingredients You’ll Need
Creating these delightful Santa Claus Macarons is surprisingly simple when you have the right ingredients on hand. Each one plays a crucial role, guaranteeing the perfect texture, flavor, and festive look that’ll impress all your loved ones. Get ready to gather ingredients that are essential for both the classic French macaron shells and the festive fillings.
- Domino® Golden Sugar (100 grams): Adds a subtle caramel depth that’s perfect for both sweetness and structure in the meringue.
- Egg white powder (4 grams, optional): Helps stabilize the meringue for a consistent rise and stronger shells.
- Egg whites (100 grams, fresh): Essential for that light and airy macaron meringue base.
- Almond flour (105 grams): Provides the nutty flavor and fine texture characteristic of macarons.
- Domino® Powdered Sugar (105 grams + extra for icing): Sweetens the macaron shells and smooths the texture.
- Meringue powder (1 tbsp): Enhances stability and volume in the meringue.
- Water (4 tbsp): Used for royal icing preparation.
- Black and yellow gel food coloring (a few drops): For creating Santa’s belt and buckle with royal icing.
- All-purpose flour (1/2 cup, 63 grams): Heat-treated for safe incorporation into the buttercream filling.
- Unsalted butter (1/2 cup, 113 grams): Creates a creamy, rich buttercream texture for the filling.
- Domino® Golden Sugar (1/4 cup, 50 grams): Sweetens the buttercream with a toasty nuance.
- Vanilla and almond extracts (1 tsp and 1/8 tsp): Infuse the filling with warm, comforting flavors.
- Milk or heavy cream (1/2 tbsp): Adjusts the buttercream’s consistency for easy piping.
- Desiccated coconut (1/4 cup, 50 grams): Adds a snowy, festive touch to the edges of the finished macarons.
How to Make Santa Claus Macarons
Step 1: Prepare the Macaron Shells
First, gather all your ingredients and line your baking sheets with parchment paper or silicone mats—prepping well ahead will save you time later. Sift the powdered sugar and almond flour together to ensure a fine, consistent texture in your shells, which is key to those signature smooth tops and delicate feet. Preheat your oven to 300ºF (or 270ºF if using convection) and allow it to stabilize. Using a double boiler, melt the granulated sugar with egg white powder if you’re using it, then whisk gently with fresh egg whites until the sugar dissolves completely, creating a smooth syrup that will whip into a glossy meringue.
Step 2: Whip the Meringue to Perfection
Transfer your warm sugar syrup to the stand mixer and whisk starting low, gradually increasing speed until the mixture forms stiff, glossy peaks that hold shape with a slight bend at the tip. This step is crucial – under-whipping can cause flat shells, and over-whipping may lead to hollow shells, so pay attention to the texture and glossiness rather than the time alone. The meringue should feel thick with some resistance when swirling around the bowl.
Step 3: Fold in the Dry Ingredients and Color
Gently add your sifted powdered sugar and almond flour into the meringue, then add red gel food coloring for that classic Santa red color. Fold carefully using a spatula with a letter J motion to incorporate the dry ingredients without deflating the meringue too much. The batter should become glossy with a flowing but thick consistency – when you draw a figure 8 with the batter, it shouldn’t break apart. This stage sets the texture and height of your final shells.
Step 4: Pipe and Rest the Shells
Transfer the batter to a piping bag and pipe evenly sized circles on your prepped baking sheets, using a template if possible to keep uniformity. Gently tap the trays to release any trapped air bubbles and pop them with a toothpick. Here’s the secret: these vibrant red shells need to rest until they form a dry, firm skin, which takes as long as needed. This skin prevents cracking during baking and contributes to the iconic macaron feet. Don’t rush this step!
Step 5: Bake the Macaron Shells
Bake one tray at a time for 15 to 20 minutes, keeping an eye out for signs that the macarons are set—firm, not jiggly, with feet rising along the edge. Oven variances will affect timing, so experiment a bit to find your personal sweet spot. Once baked, cool them completely before moving on to the filling and decorating.
Step 6: Make Royal Icing and Decorate
Whip up royal icing using powdered sugar, meringue powder, and water until glossy and thick but flowy. Divide and tint with black and yellow gel colors for Santa’s signature belt. Pipe a black line across half of the macaron shells to mimic the belt, then add a yellow buckle detail once dry. Keep your icing covered to prevent crusting as you work.
Step 7: Prepare Sugar Cookie Buttercream Filling
Heat-treat flour by toasting it lightly in the oven to ensure it’s safe to eat raw. Then beat butter and sugars until creamy, fold in the cooled flour and extracts, and adjust consistency with milk or cream. This buttercream is rich and perfectly balanced with just enough sweetness and a hint of almond and vanilla, complementing the nutty macaron shells wonderfully.
Step 8: Assemble the Santa Claus Macarons
Pipe a generous dollop of buttercream onto the undecorated macaron shells, sandwich each with a decorated top shell, and gently roll the edges in shredded coconut for a festive snowy finish. Voilà! The little Santa-themed macarons are ready to dazzle and delight.
How to Serve Santa Claus Macarons
Garnishes
Add a sprinkle of edible glitter or a few flakes of desiccated coconut on top of the finished macarons to enhance their festive appearance. You can also use tiny red sugar pearls atop for an extra jolly touch that catches the light beautifully.
Side Dishes
Serve these macarons alongside a warm cup of spiced hot chocolate or a classic eggnog for a cozy holiday treat. Fresh cranberries or a light berry compote make a stunning, tart contrast that balances their sweet richness superbly.
Creative Ways to Present
Arrange your Santa Claus Macarons on a holiday-themed platter or stack them in a clear glass jar with red and green ribbons for a charming edible gift. Mini wooden crates or festive tins also create an eye-catching display that invites guests to indulge happily.
Make Ahead and Storage
Storing Leftovers
Santa Claus Macarons keep wonderfully in an airtight container in the refrigerator for up to five days. This allows the flavors to meld a bit more, and the shells stay delightfully chewy yet crisp. Just be sure to bring them to room temperature before serving for the best texture.
Freezing
These macarons freeze beautifully for 1 to 2 months. Freeze them flat in a single layer on a baking sheet first, then transfer to airtight containers or heavy-duty freezer bags. Thaw in the fridge overnight and then at room temperature before enjoying to preserve their signature delicate texture.
Reheating
Since macarons are best enjoyed fresh or chilled, reheating isn’t necessary. If you prefer a slightly softer bite, allow frozen macarons to thaw naturally and avoid the microwave, which can make the shells rubbery or lose their crisp edges.
FAQs
Can I use fresh egg whites instead of egg white powder?
Absolutely! Fresh egg whites work perfectly in this recipe. Egg white powder is optional and helps stabilize the meringue for consistent results, but you can omit it without drastically affecting your Santa Claus Macarons.
Why do the macaron shells need to rest before baking?
Resting allows the shells to develop a dry skin on the surface, which prevents cracking and helps form the classic macaron feet during baking. It’s a vital step to ensure those delicate, smooth shells.
What causes hollow macarons, and how can I avoid it?
Hollow shells often result from over-whipping the meringue or over-folding the batter, which traps excessive air. Be gentle with folding and carefully monitor your meringue’s stiffness to achieve perfect Santa Claus Macarons.
Can I make Santa Claus Macarons in different colors?
Yes! While red is traditional for Santa, feel free to experiment with various gel food colors to match your holiday theme. Just remember that adding lots of coloring can affect the drying time and texture, so adjust resting accordingly.
How do I prevent my macarons from sticking to the baking sheet?
Use parchment paper or silicone baking mats, and make sure your shells have rested long enough before baking. Proper resting ensures a skin forms that reduces sticking, plus the nonstick surface helps ease their removal.
Final Thoughts
Making Santa Claus Macarons is such a joyful and rewarding experience — from piping the vibrant shells to decorating little Santa belts and buckles, it’s truly a labor of love that brings festive cheer with every bite. Whether for gifts, parties, or a special holiday treat just for yourself, these macarons are sure to become a favorite tradition. Don’t hesitate to dive in and share the magic of Santa Claus Macarons this season!
Print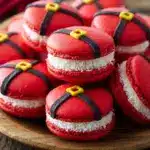
Santa Claus Macarons Recipe
- Total Time: 1 hour 30 minutes
- Yield: About 24 macarons (12 filled sandwiches) 1x
- Diet: Vegetarian
Description
These festive Santa Claus Macarons combine delicate almond meringue shells with a creamy sugar cookie buttercream filling and are beautifully decorated with royal icing to resemble Santa’s iconic belt and buckle. Perfect for holiday celebrations, they offer a delightful balance of crisp texture, rich flavors, and eye-catching presentation.
Ingredients
Macaron Shells
- 100 grams Domino® Golden Sugar
- 4 grams egg white powder (optional)
- 100 grams egg whites
- 105 grams almond flour
- 105 grams Domino® Powdered Sugar
- 1 tbsp meringue powder
- 4 tbsp water
- 2 drops black gel food coloring
- 1 drop yellow gel food coloring
Filling – Sugar Cookie Buttercream
- 1/2 cup all-purpose flour (63 grams)
- 1/2 cup unsalted butter (113 grams)
- 1/4 cup Domino® Golden Sugar (50 grams)
- 1 1/4 cup Domino® Powdered Sugar (156 grams)
- 1 tsp vanilla extract
- 1/8 tsp almond extract
- 1/2 tbsp milk or heavy cream
- 1/4 cup desiccated coconut (shredded) (50 grams)
Royal Icing
- 1 1/2 cups Domino® Powdered Sugar (187 grams)
- 1 tbsp meringue powder
- 4 tbsp water
- Black gel food coloring
- Yellow gel food coloring
Instructions
- Prepare Ingredients and Equipment: Gather all ingredients and prepare two baking sheets lined with parchment paper or silicone mats. Fit a large piping bag with a 1/4″ round tip and set aside.
- Sift Dry Ingredients: Sift together the powdered sugar and almond flour to ensure there are no lumps, then set aside.
- Preheat Oven: Preheat your oven to 300ºF and maintain it for 60 to 90 minutes beforehand to stabilize temperature. For convection ovens, lower to 270ºF and experiment as needed.
- Make Sugar Syrup: Place a heatproof bowl over barely simmering water (bain-marie). Add granulated sugar and egg white powder (if using) to the bowl and whisk to prevent clumps.
- Add Egg Whites and Melt Sugar: Add the egg whites and whisk continuously until the sugar has fully dissolved. Avoid overheating or letting the bowl touch the water.
- Transfer to Mixer and Whip Meringue: Move sugar-egg mixture to a stand mixer bowl. Whip on low speed for 30 seconds, medium-low for 2 minutes, then medium-high until stiff peaks form, approximately 13-15 minutes. Look for glossy meringue that holds stiff peaks.
- Fold in Dry Ingredients: Add sifted almond flour and powdered sugar mixture to the meringue along with red gel food coloring (about 1 tbsp). Fold gently using a spatula to combine without deflating the batter. Fold until the batter flows in thick ribbons and passes the figure-8 test.
- Piping Macarons: Transfer batter to the piping bag, sealing the top to prevent drying. Pipe rounds onto prepared trays over the macaron template, holding the bag perpendicular and applying gentle pressure.
- Remove Air Bubbles and Rest: Tap trays firmly on the counter to release air bubbles. Pop any remaining air bubbles with a toothpick. Let shells rest until a firm skin forms on top—dry to the touch but not soft.
- Bake Shells: Bake trays one at a time for 15 to 20 minutes, adjusting timing based on your oven. Macarons should have feet and a firm top when done. Cool completely before removing from trays.
- Make Royal Icing: In the mixer bowl, combine powdered sugar and meringue powder. Gradually add water while mixing on low, then whip on medium-high until glossy and fluffy with a thick, flowy consistency. Divide into two portions and tint one black and the other yellow. Place each into piping bags with small round tips.
- Decorate Macaron Shells: Pipe a line of black royal icing across the middle of about half the macaron shells to form Santa’s belt. Allow to dry fully (fridge accelerates drying). Then pipe a small square buckle with yellow icing on top of the black line.
- Prepare Sugar Cookie Buttercream: Heat treat the flour by spreading it on a baking tray and baking at 350ºF for 5 minutes, stirring once. Let cool. In a mixer, beat butter and sugars for 4-5 minutes until creamy. Add cooled flour, vanilla, almond extract, and mix on low. Add milk or cream if needed to reach desired consistency.
- Assemble Macarons: Pipe buttercream onto the bottom macaron shells. Top with the decorated top shells. Gently roll the sides of each assembled macaron in shredded desiccated coconut for a festive touch.
- Storage: Store macarons in an airtight container. They keep well refrigerated for up to 5 days and freeze excellently for 1-2 months.
Notes
- Egg white powder is optional and can be omitted without affecting the recipe.
- Resting the shells to form a skin before baking is critical, especially due to the large amount of red food coloring.
- Oven temperatures vary, so adjust baking time and temperature accordingly.
- Overwhipping or underwhipping meringue can cause hollow or flat macarons.
- Heat treating flour for the buttercream ensures it is safe to eat raw.
- Keep royal icing covered to prevent it from drying out during decorating.
- Seal piping bag tops to prevent batter from drying and to maintain better control while piping.
- Using a macaron template on baking mats helps achieve consistent shell sizes.
- Rolling filled macarons in shredded coconut adds texture and festive appeal.
- Prep Time: 45 minutes
- Cook Time: 20 minutes per tray (approximately 40 minutes total)
- Category: Dessert
- Method: Baking, Whipping, Piping
- Cuisine: French
Nutrition
- Serving Size: 2 macarons (1 sandwich)
- Calories: 180
- Sugar: 20g
- Sodium: 40mg
- Fat: 8g
- Saturated Fat: 4.5g
- Unsaturated Fat: 2g
- Trans Fat: 0g
- Carbohydrates: 25g
- Fiber: 1g
- Protein: 3g
- Cholesterol: 25mg
Keywords: Santa Claus macarons, holiday macarons, festive macarons, almond macarons, royal icing decoration, sugar cookie buttercream, Christmas desserts

